
Block: Carousel Header
Display several photos on a scrolling carousel for the home page!
📚 Create Content > Blocks > Carousel Header
Definition & Purpose
Definition
The Carousel header is a gallery block that features a scrolling collection of images and media content, typically found at the top of the Homepage. Editors can add a header, text, and CTA overlaid on top of the image.
Purpose
Provides a visually engaging way to display and highlight content, allowing for a more dynamic and interactive experience.
Using a Carousel Header
Creating the Carousel
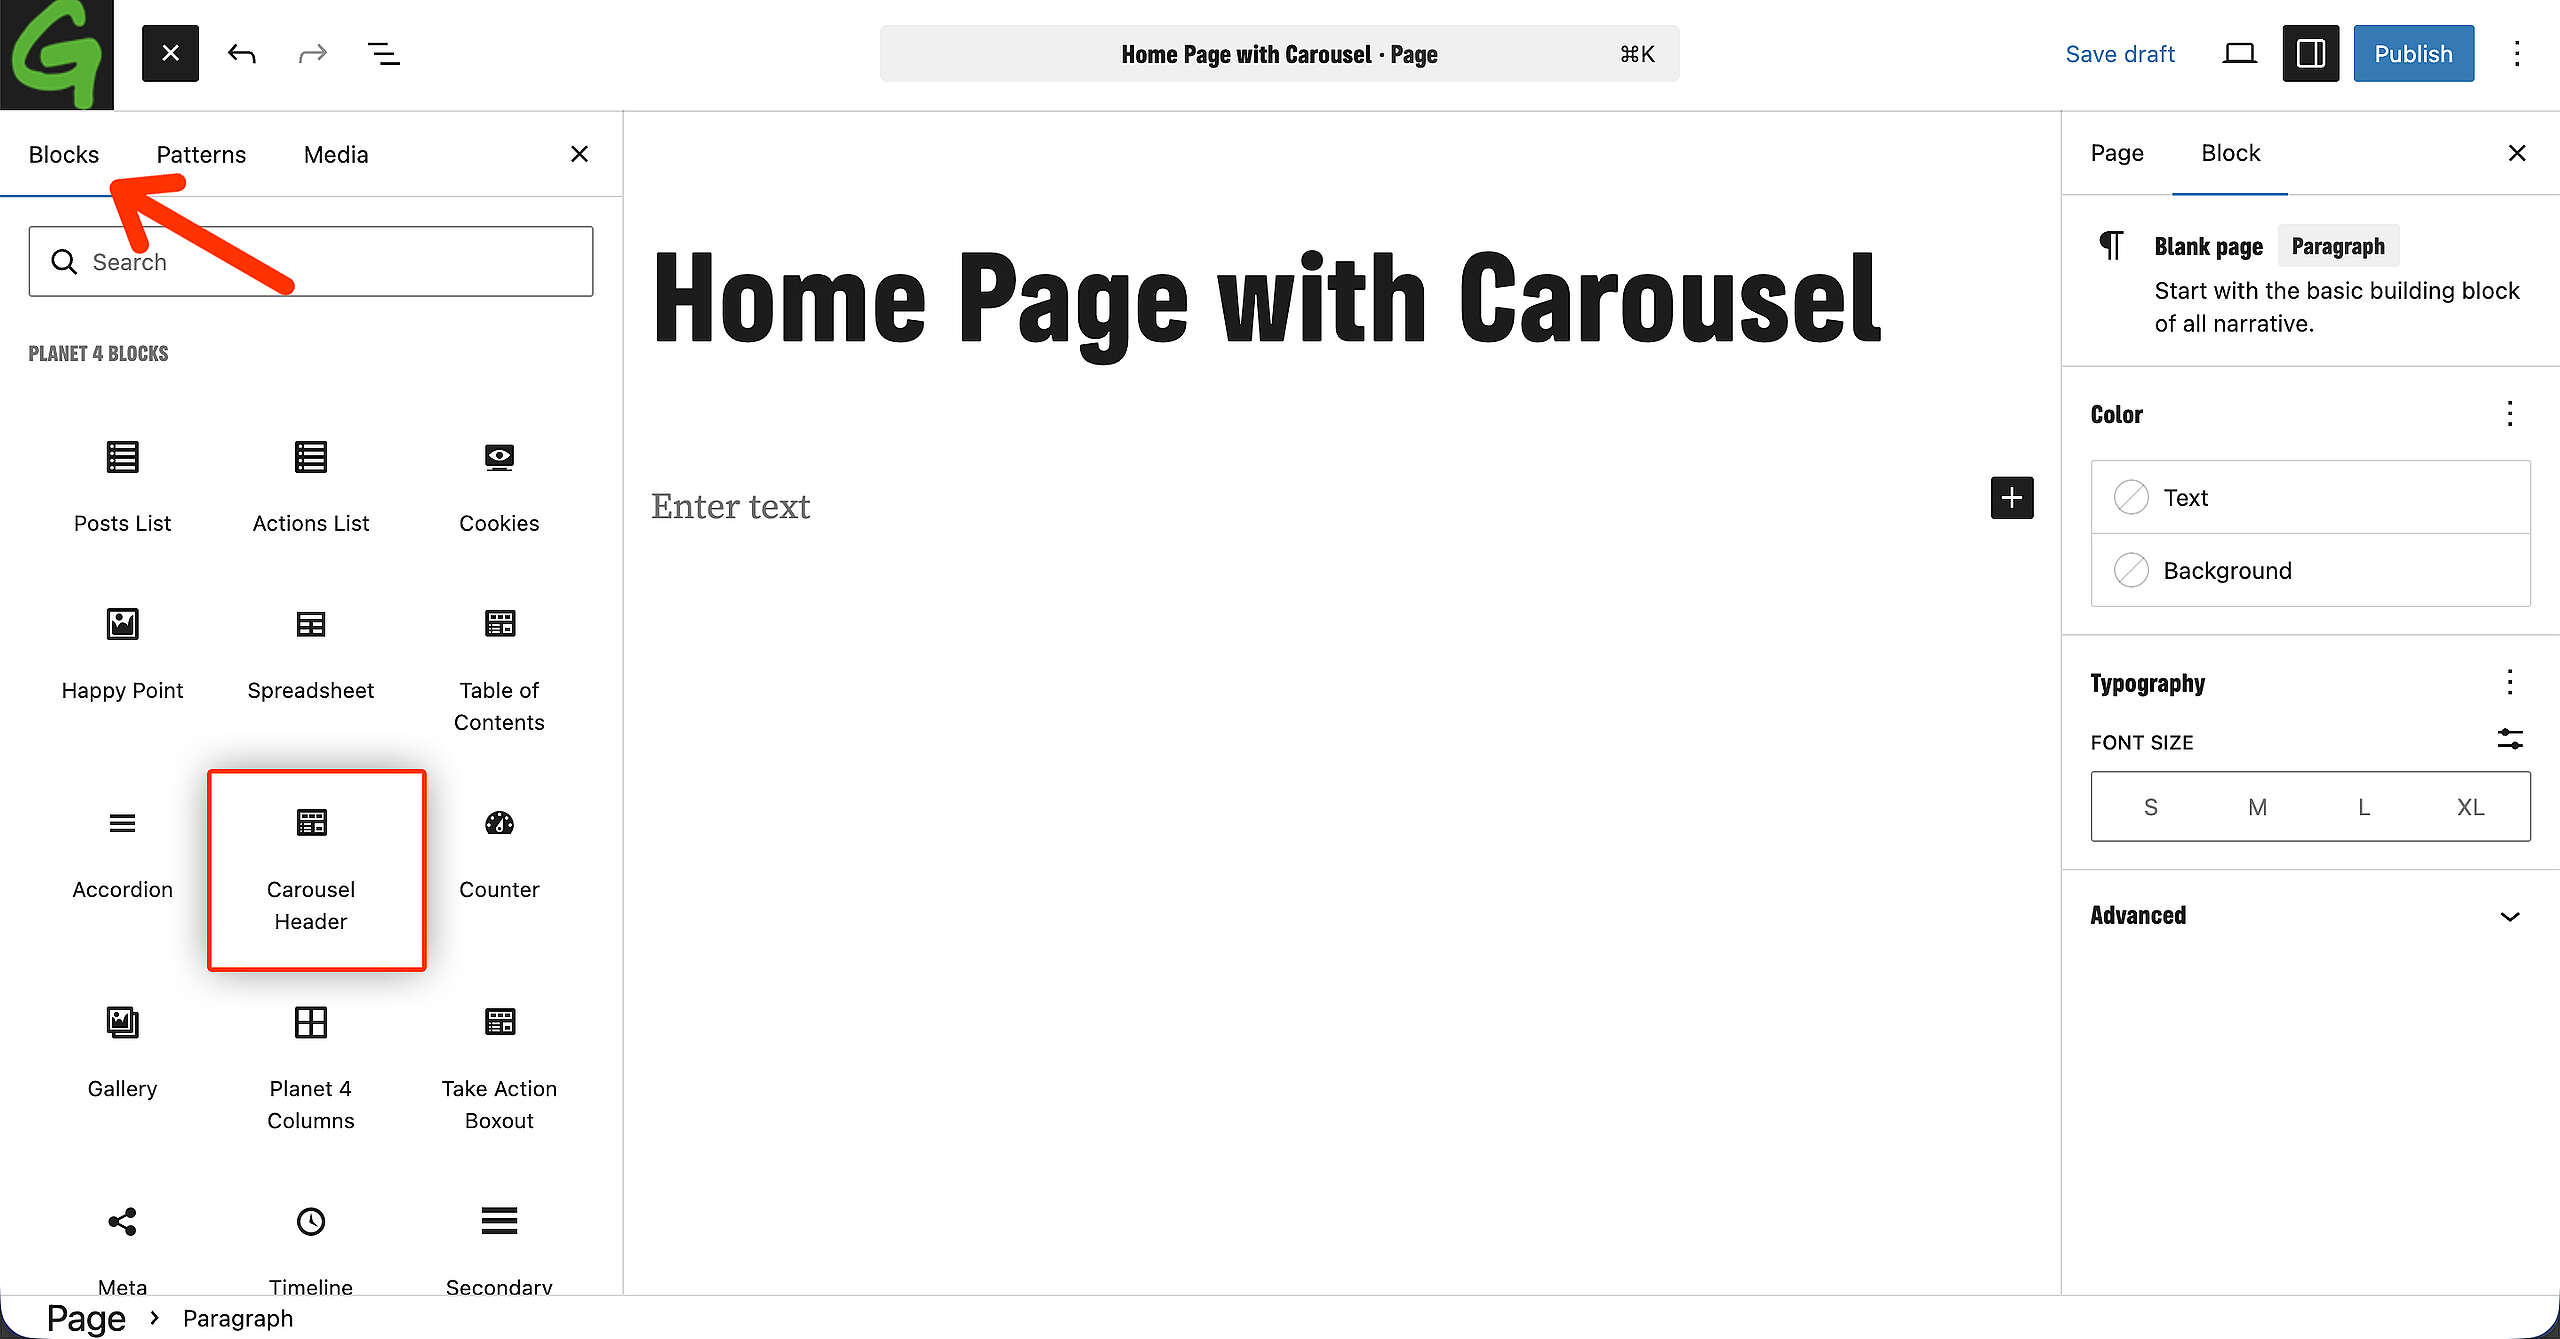
On the left Blocks overview, find the Carousel Header Block. Simply click on it to add it to the Page, or drag and drop it.
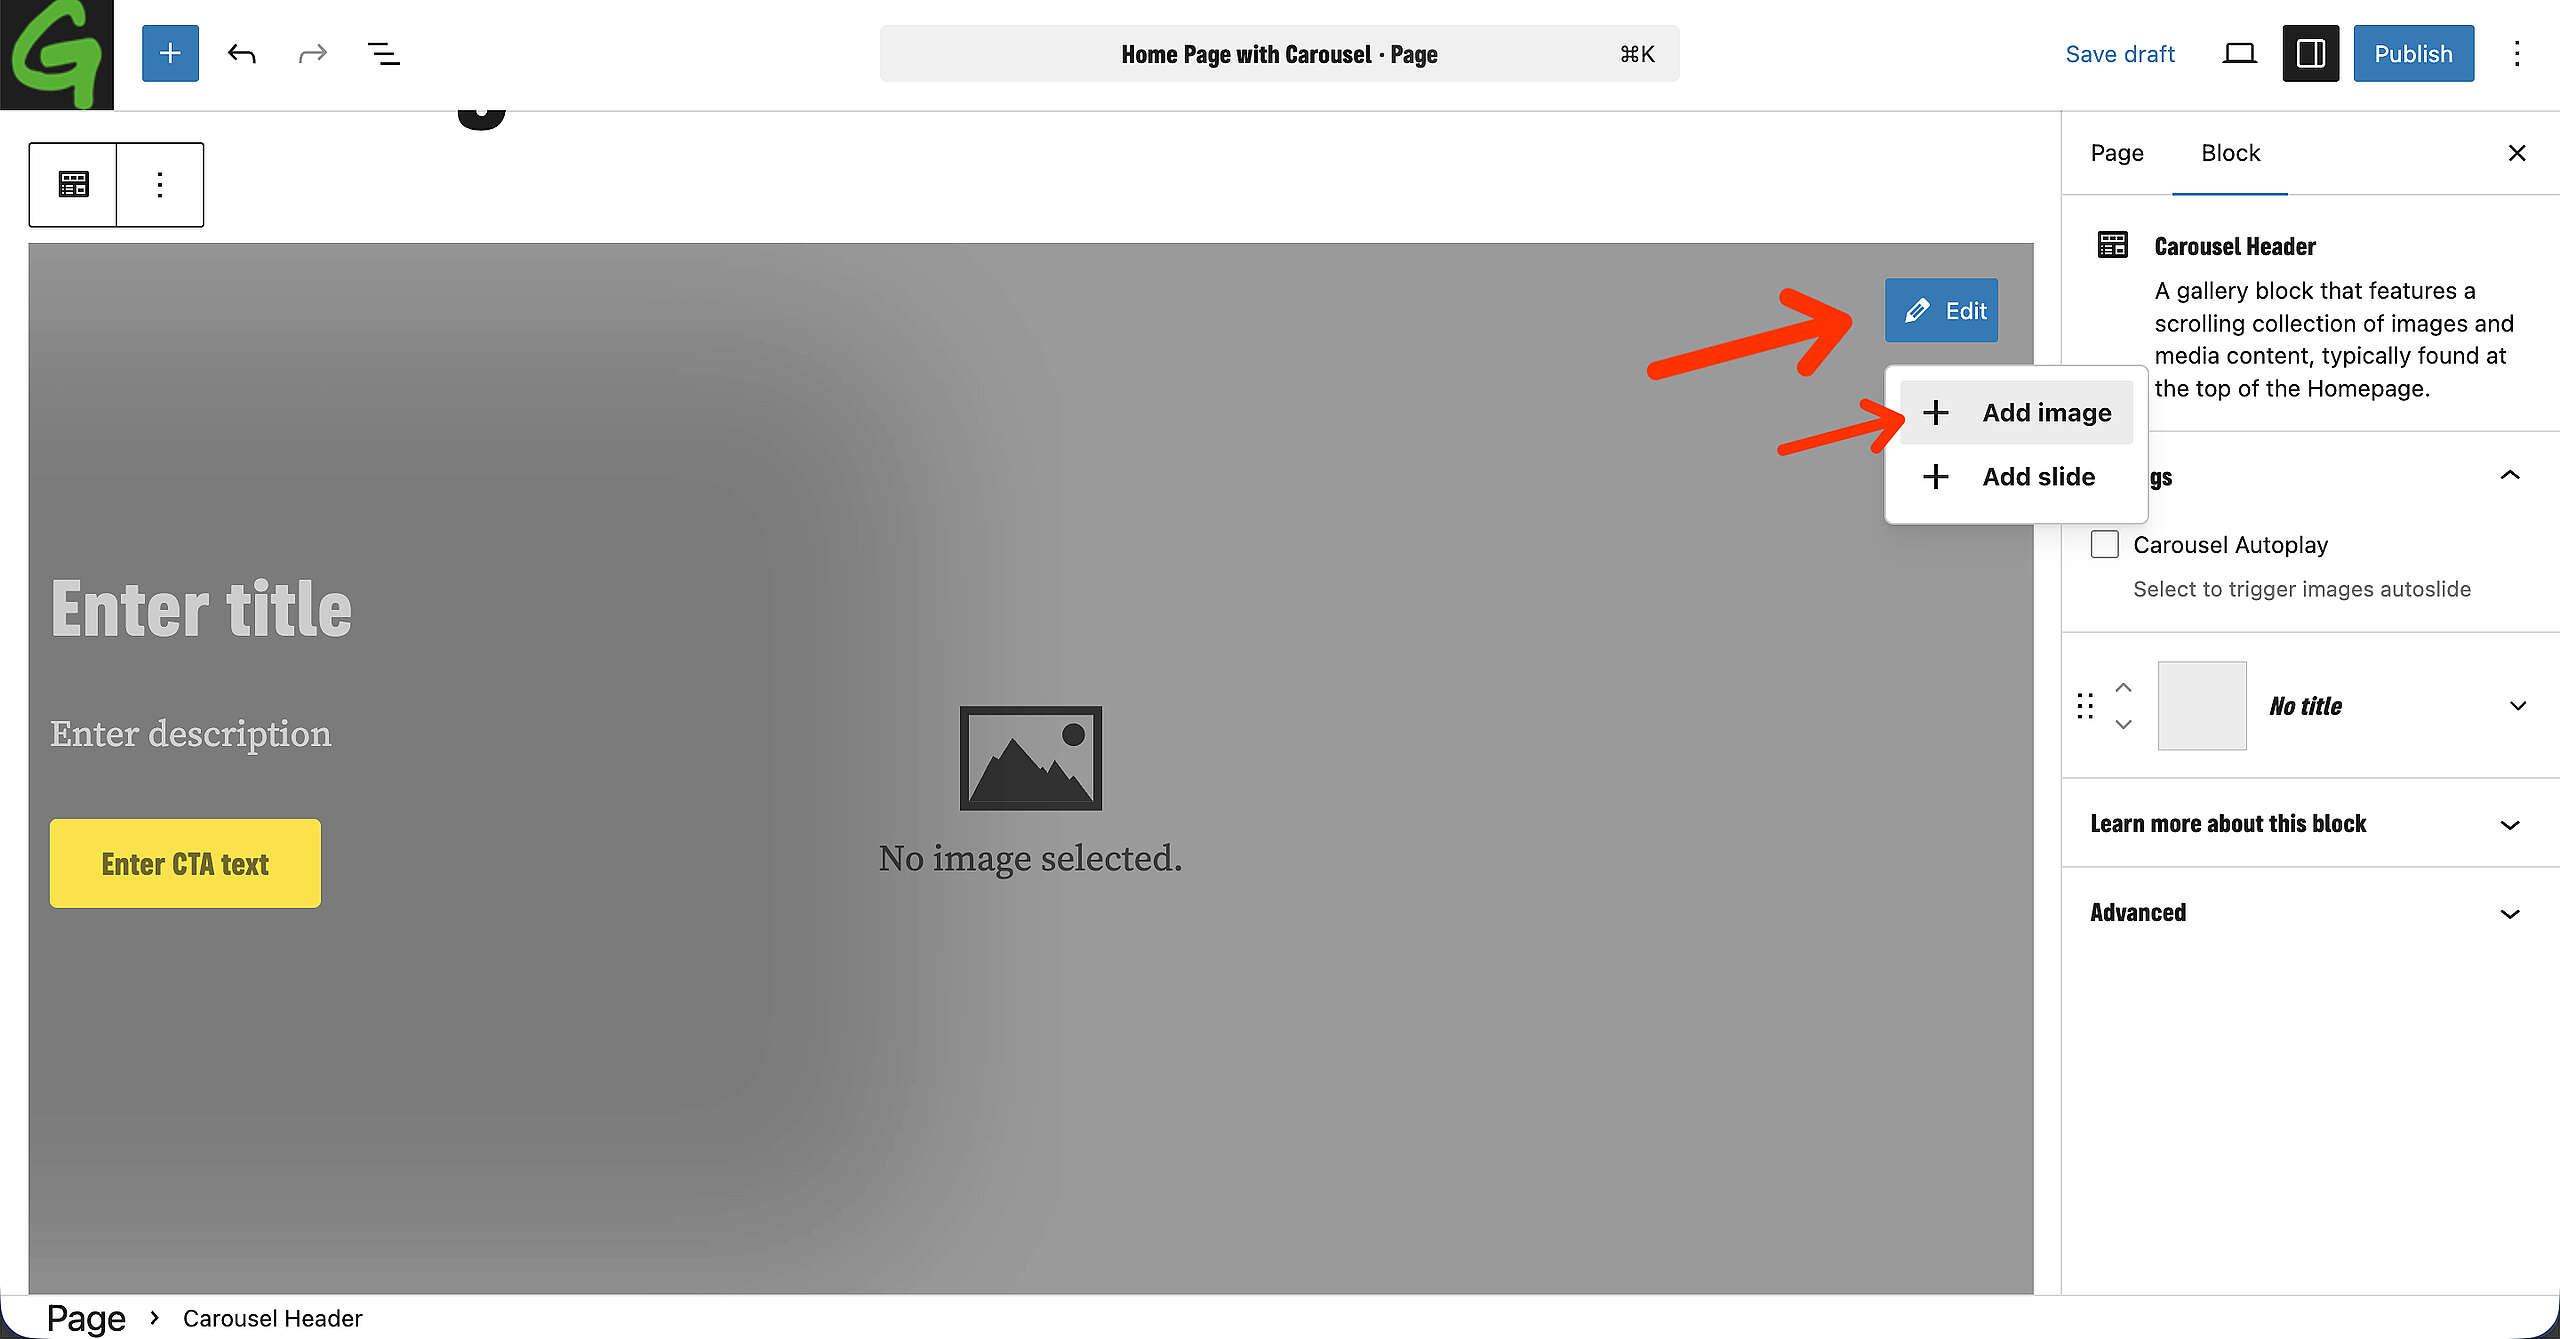
First, let’s do the background image. Click on Edit, and then Add image. Your Media Library will open, where you can upload a new image or select one that you’ve uploaded before.
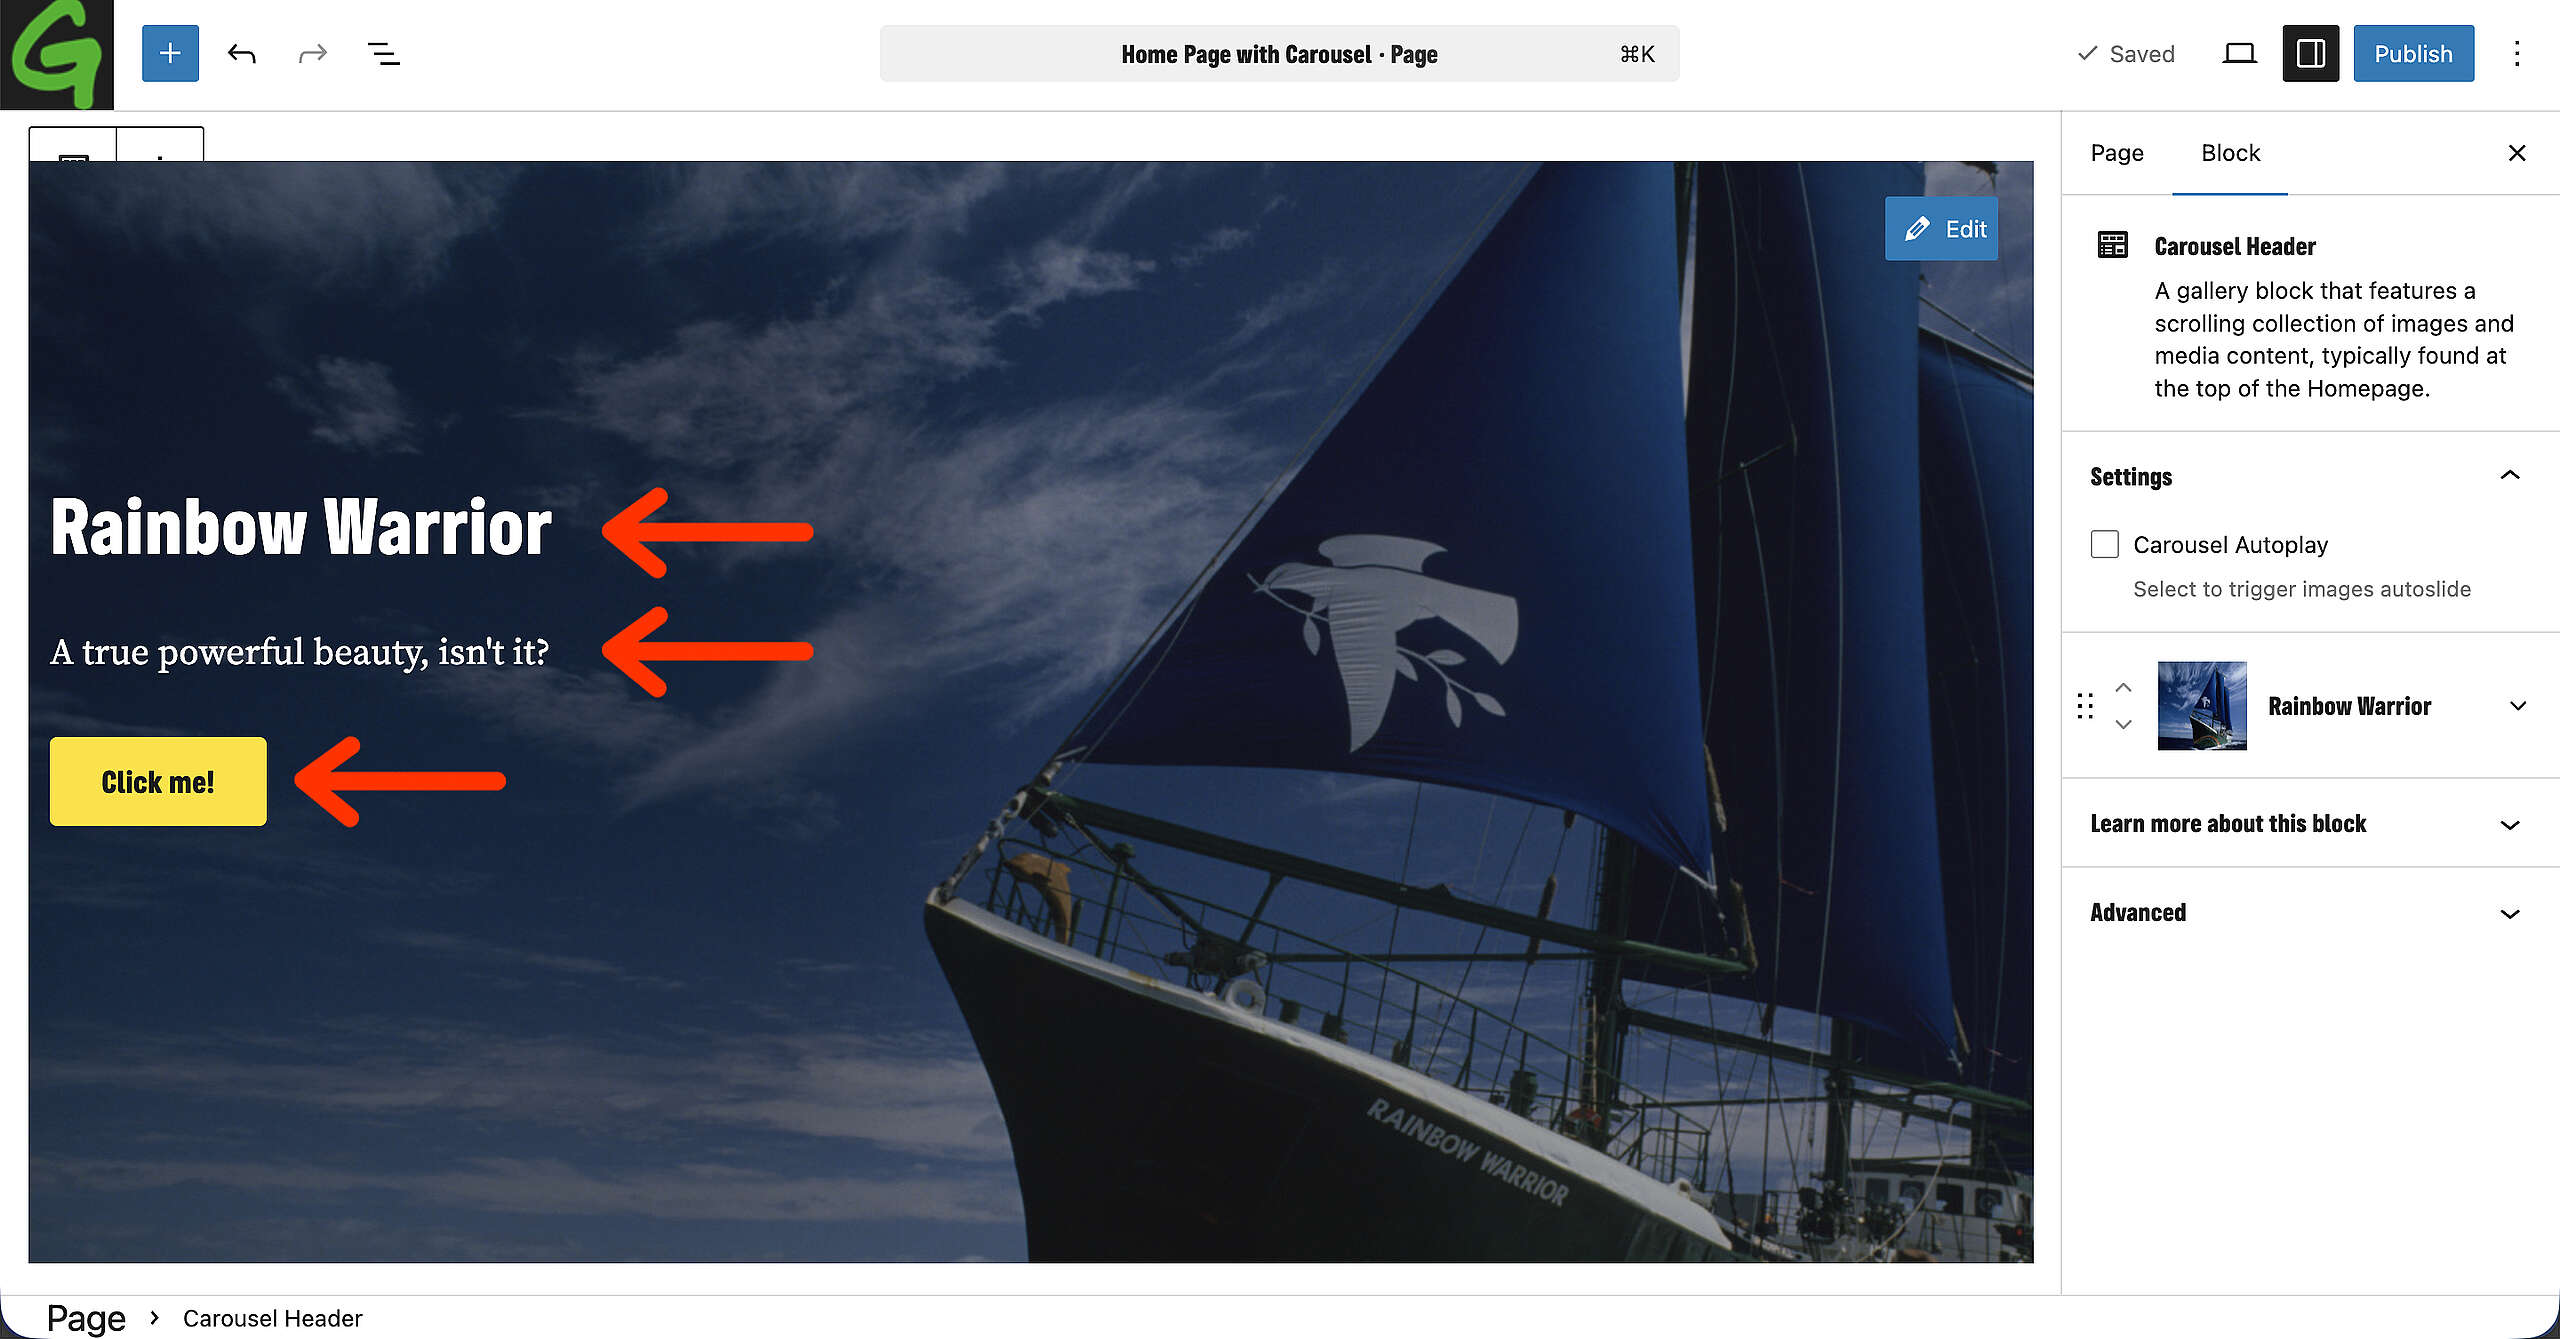
Once the image is there, let’s do the text. You can add a small title, a description and add text to the button.
To add/change the link for that button, open the slide panel on the right sidebar, in the Block options. There, you’ll be able to add the URL for the button its link. You can also select if the link should open in a new tab or not by checking the checkbox.
Additionally, you can also change the image focal point, in case the subject of your image is more on the side for example.

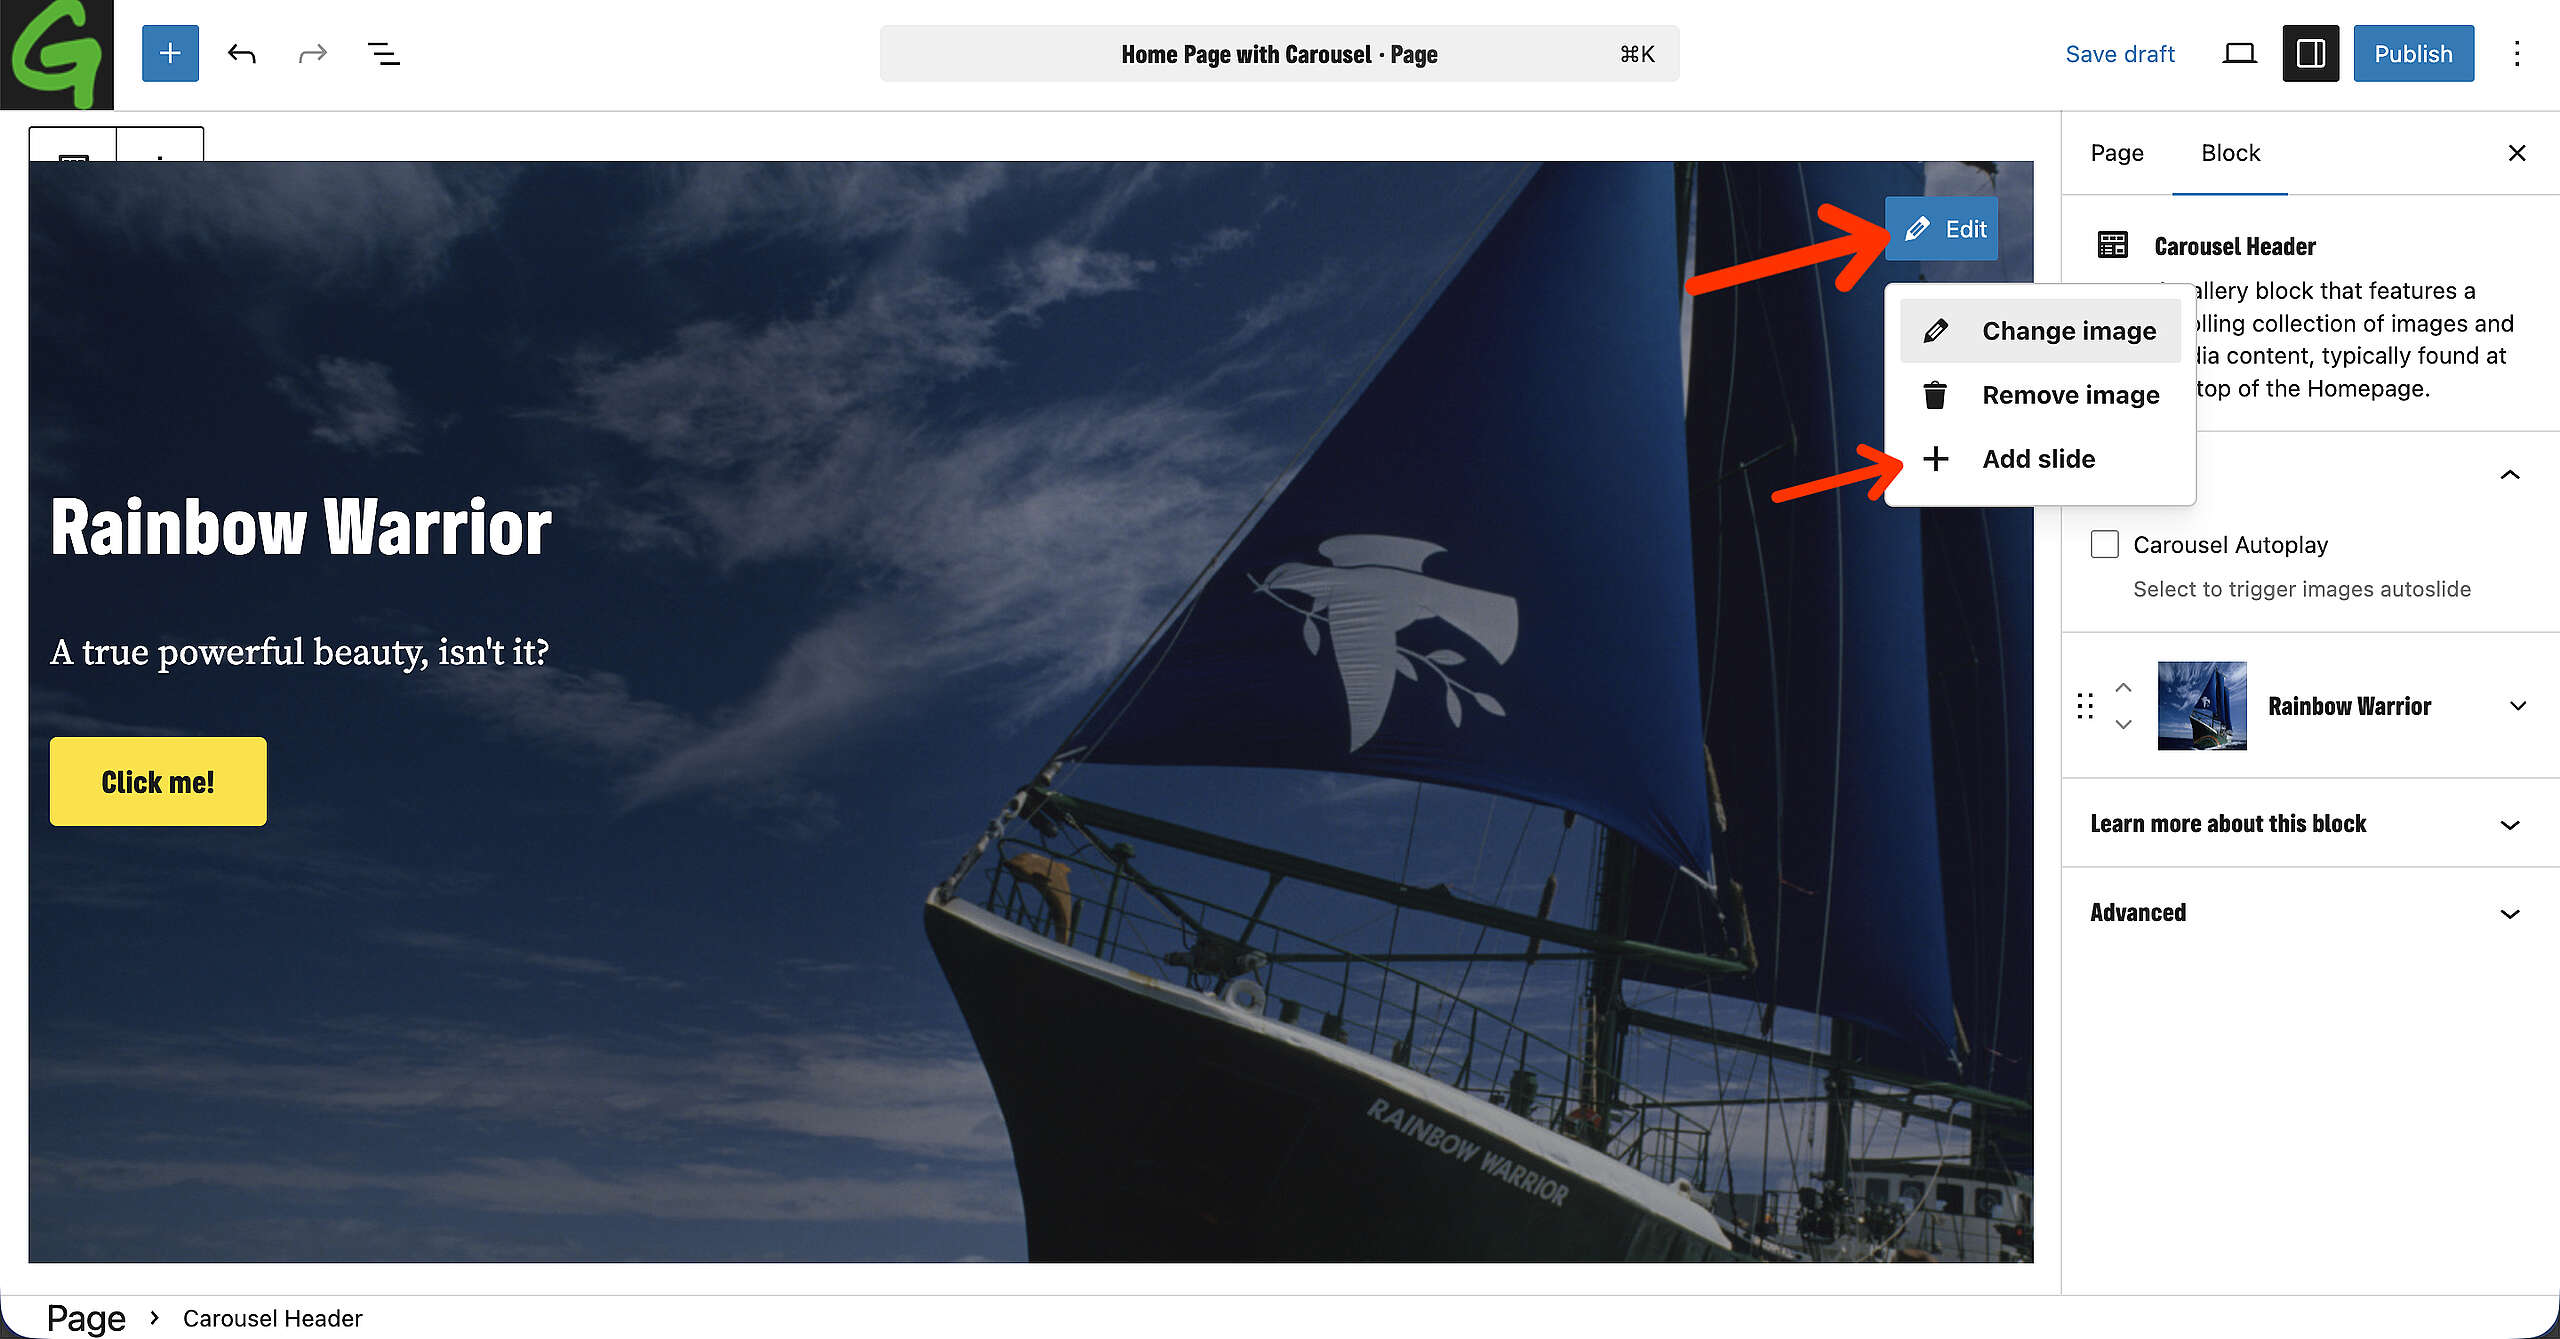
After you’ve done this, let’s add another slide to the Carousel. Again: Click on Edit and then Add slide. And create that slide the same way as above.
Settings and Changing the Order
There’s two settings to explore in the Carousel Header. First, the autoplay feature. Check this box if you want the slides of the Carousel to trigger automatically. (Users can still change slides themselves by using the arrows on the site.)

You can also change the order of the Slides. You can either drag and drop the Slides, or use the arrows, to change the order.
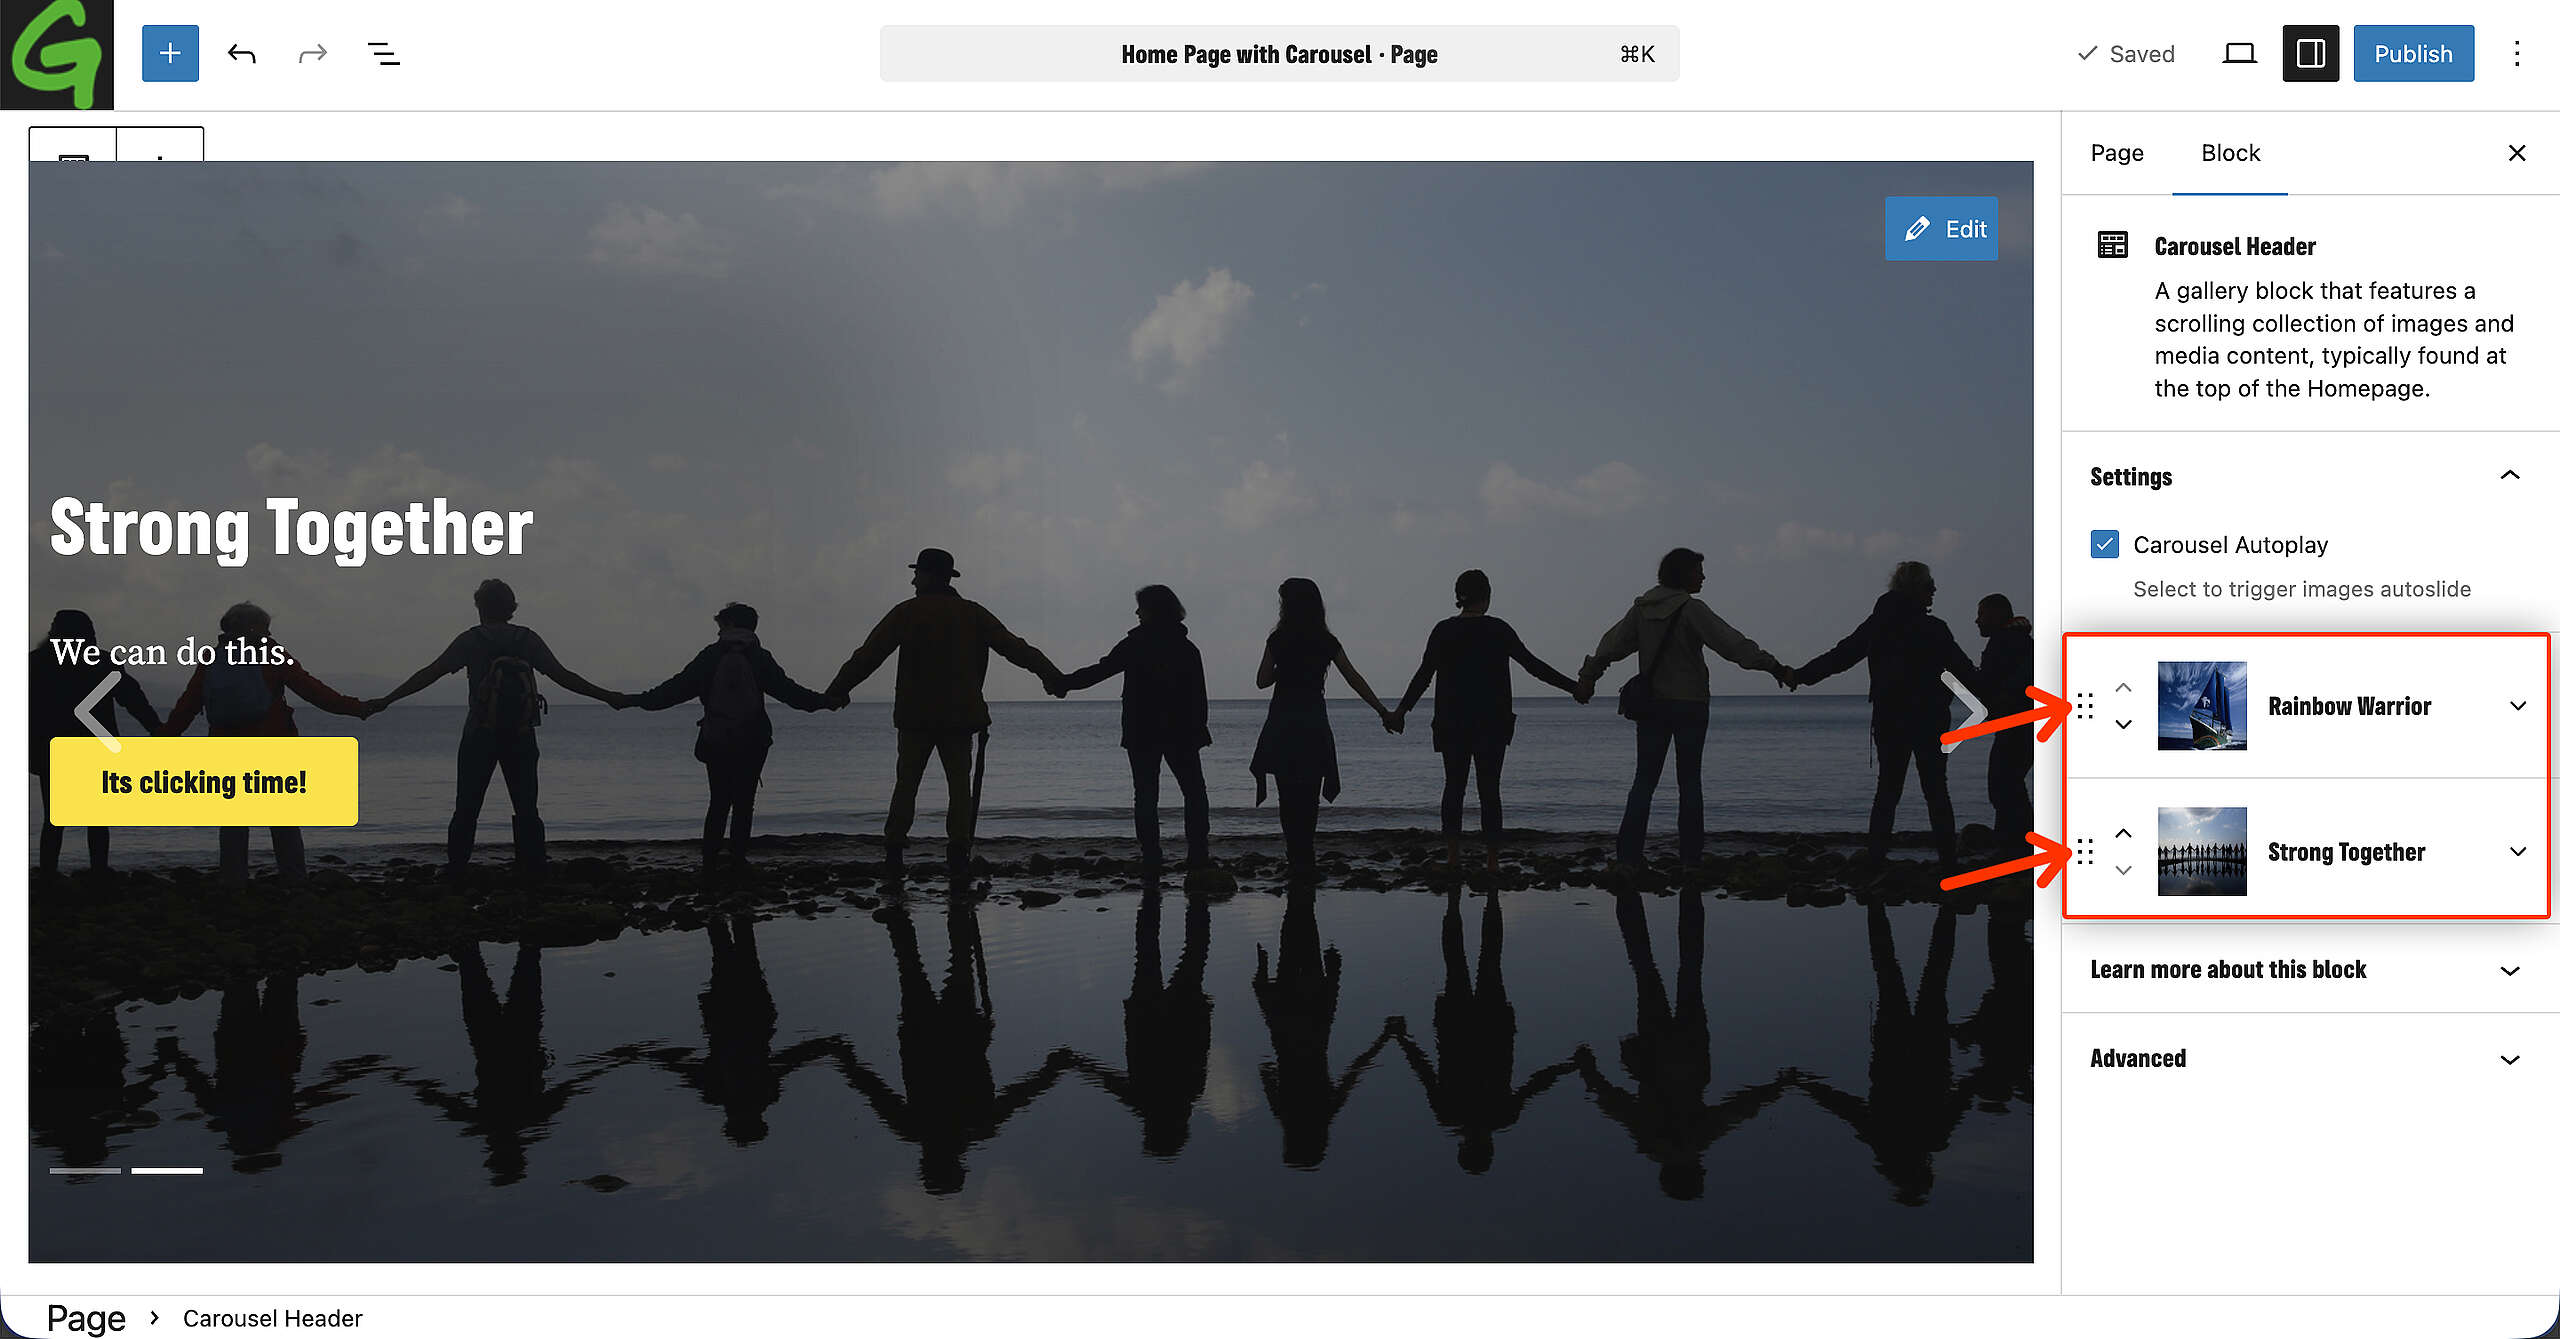
And we’re done! Time to publish!
Oops, small mistake!
A mistake that sometimes might happen is that the page title still appears on the page. Doesn’t look too pretty.
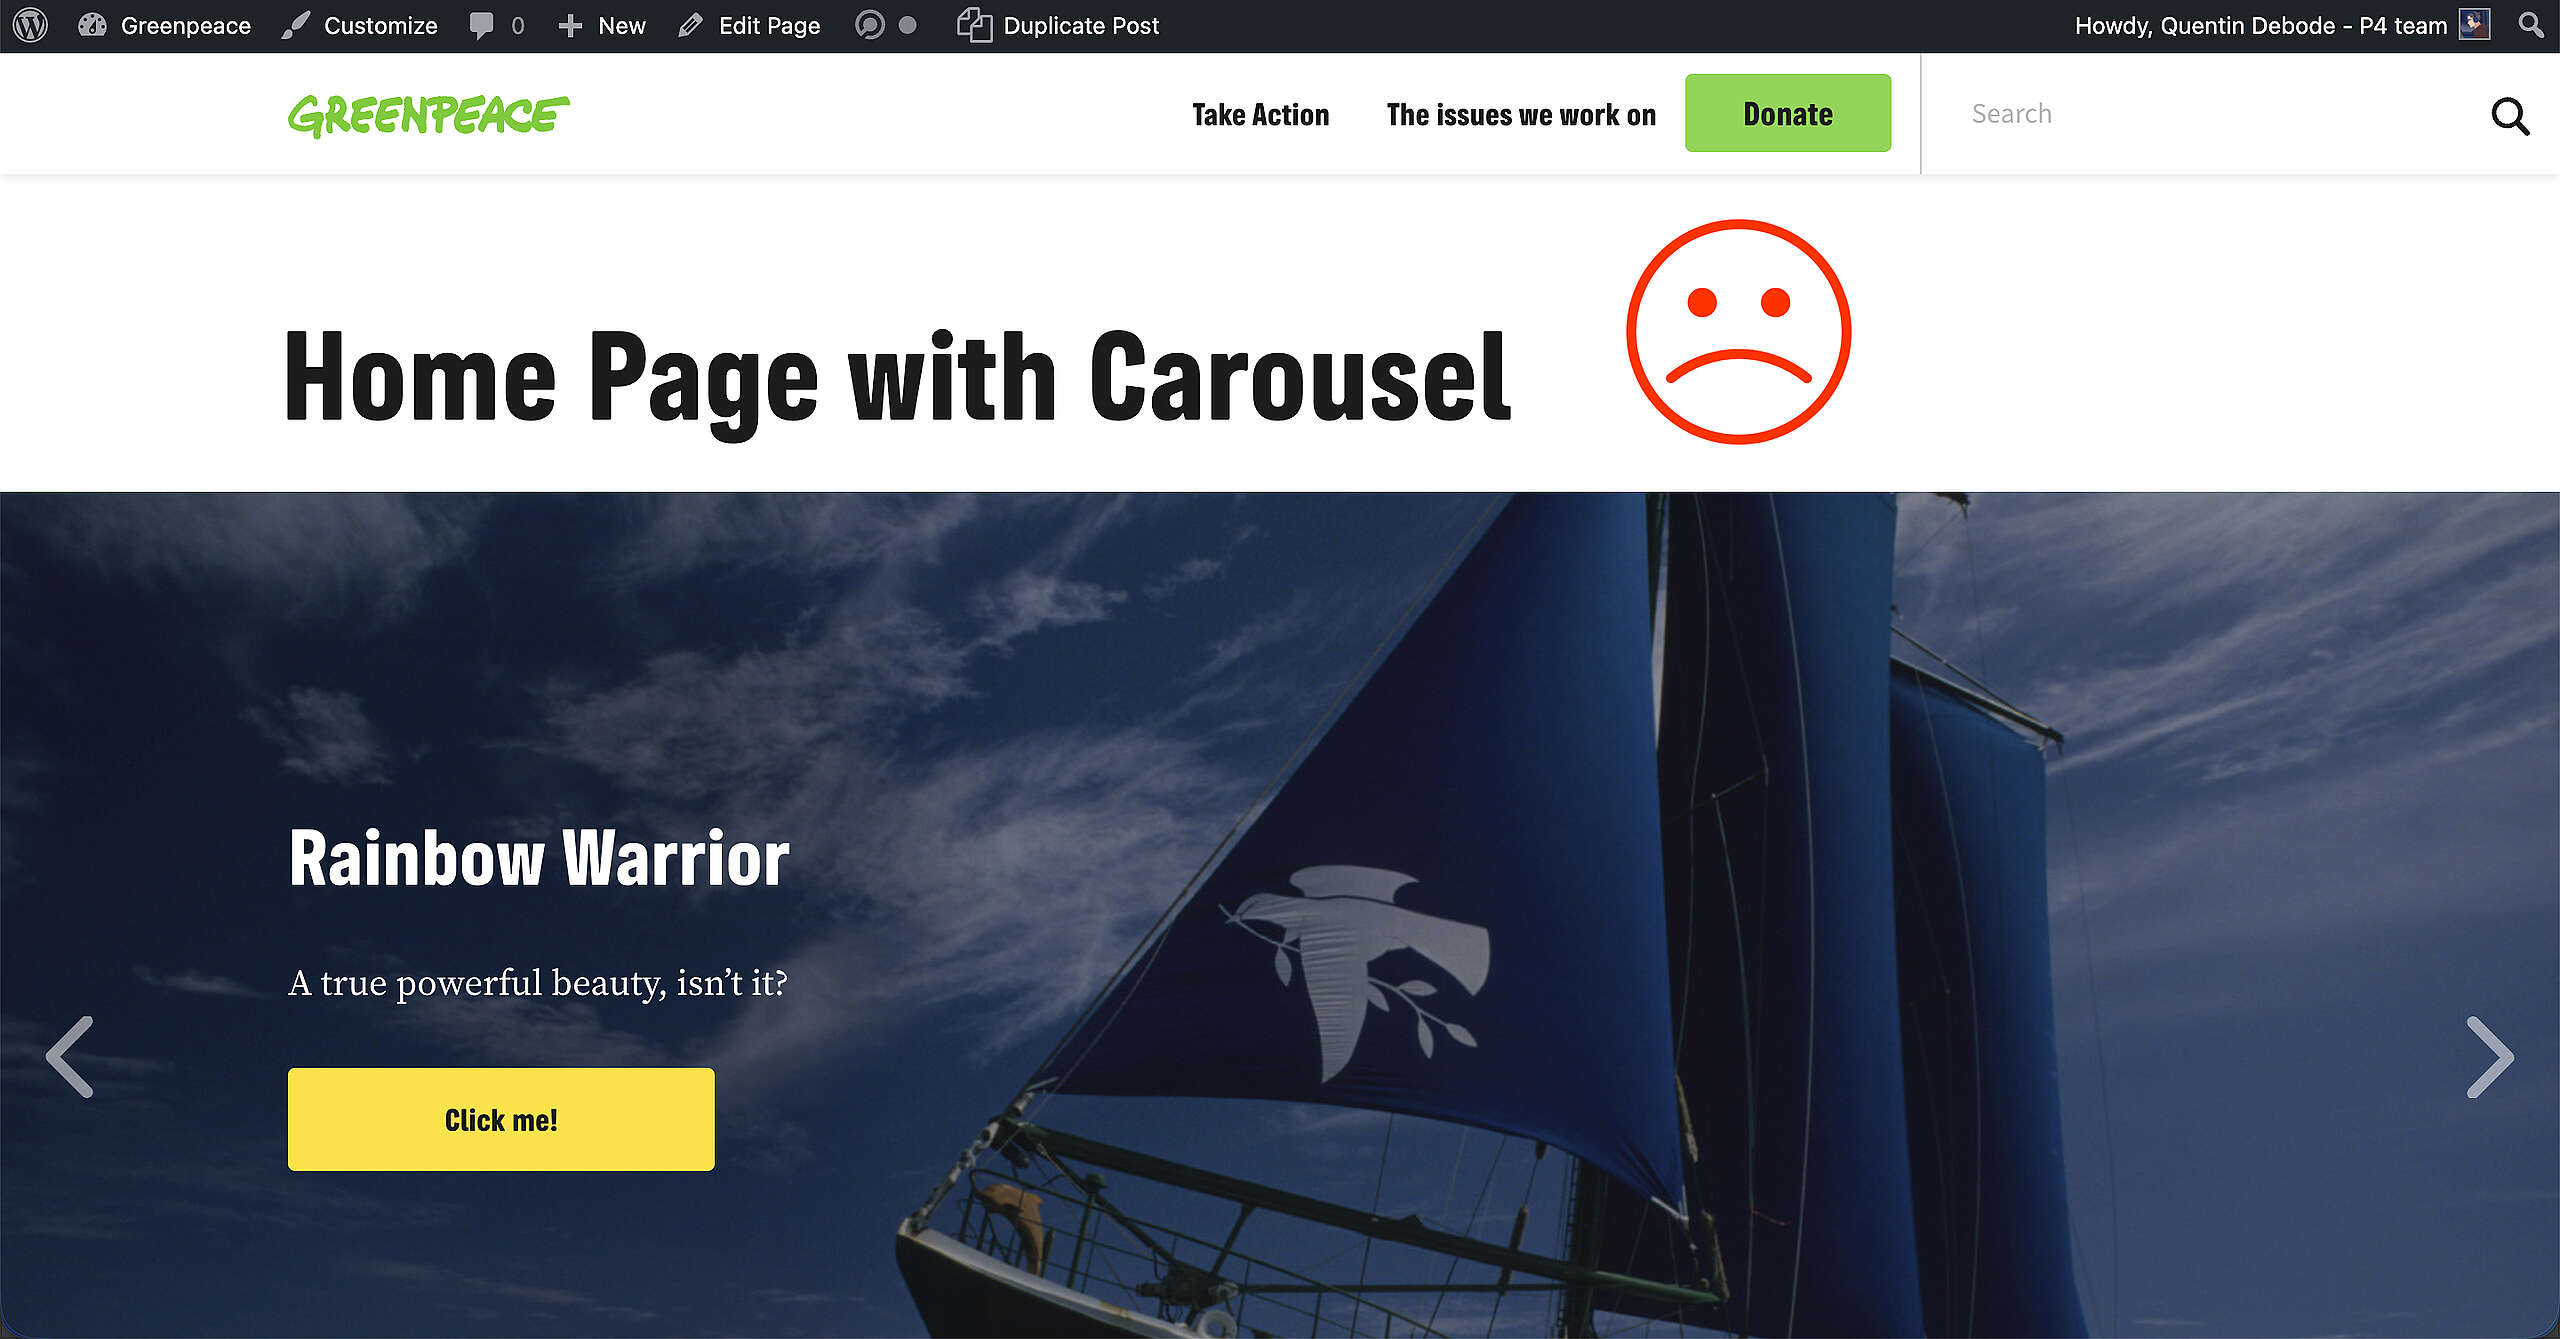
To remove the page title from this Page, go back into the editor and find Page header in the right sidebar. Make sure that “Hide page title” is checked. Save the page again, and the Carousel Header will stick to the top, without that page title in between.
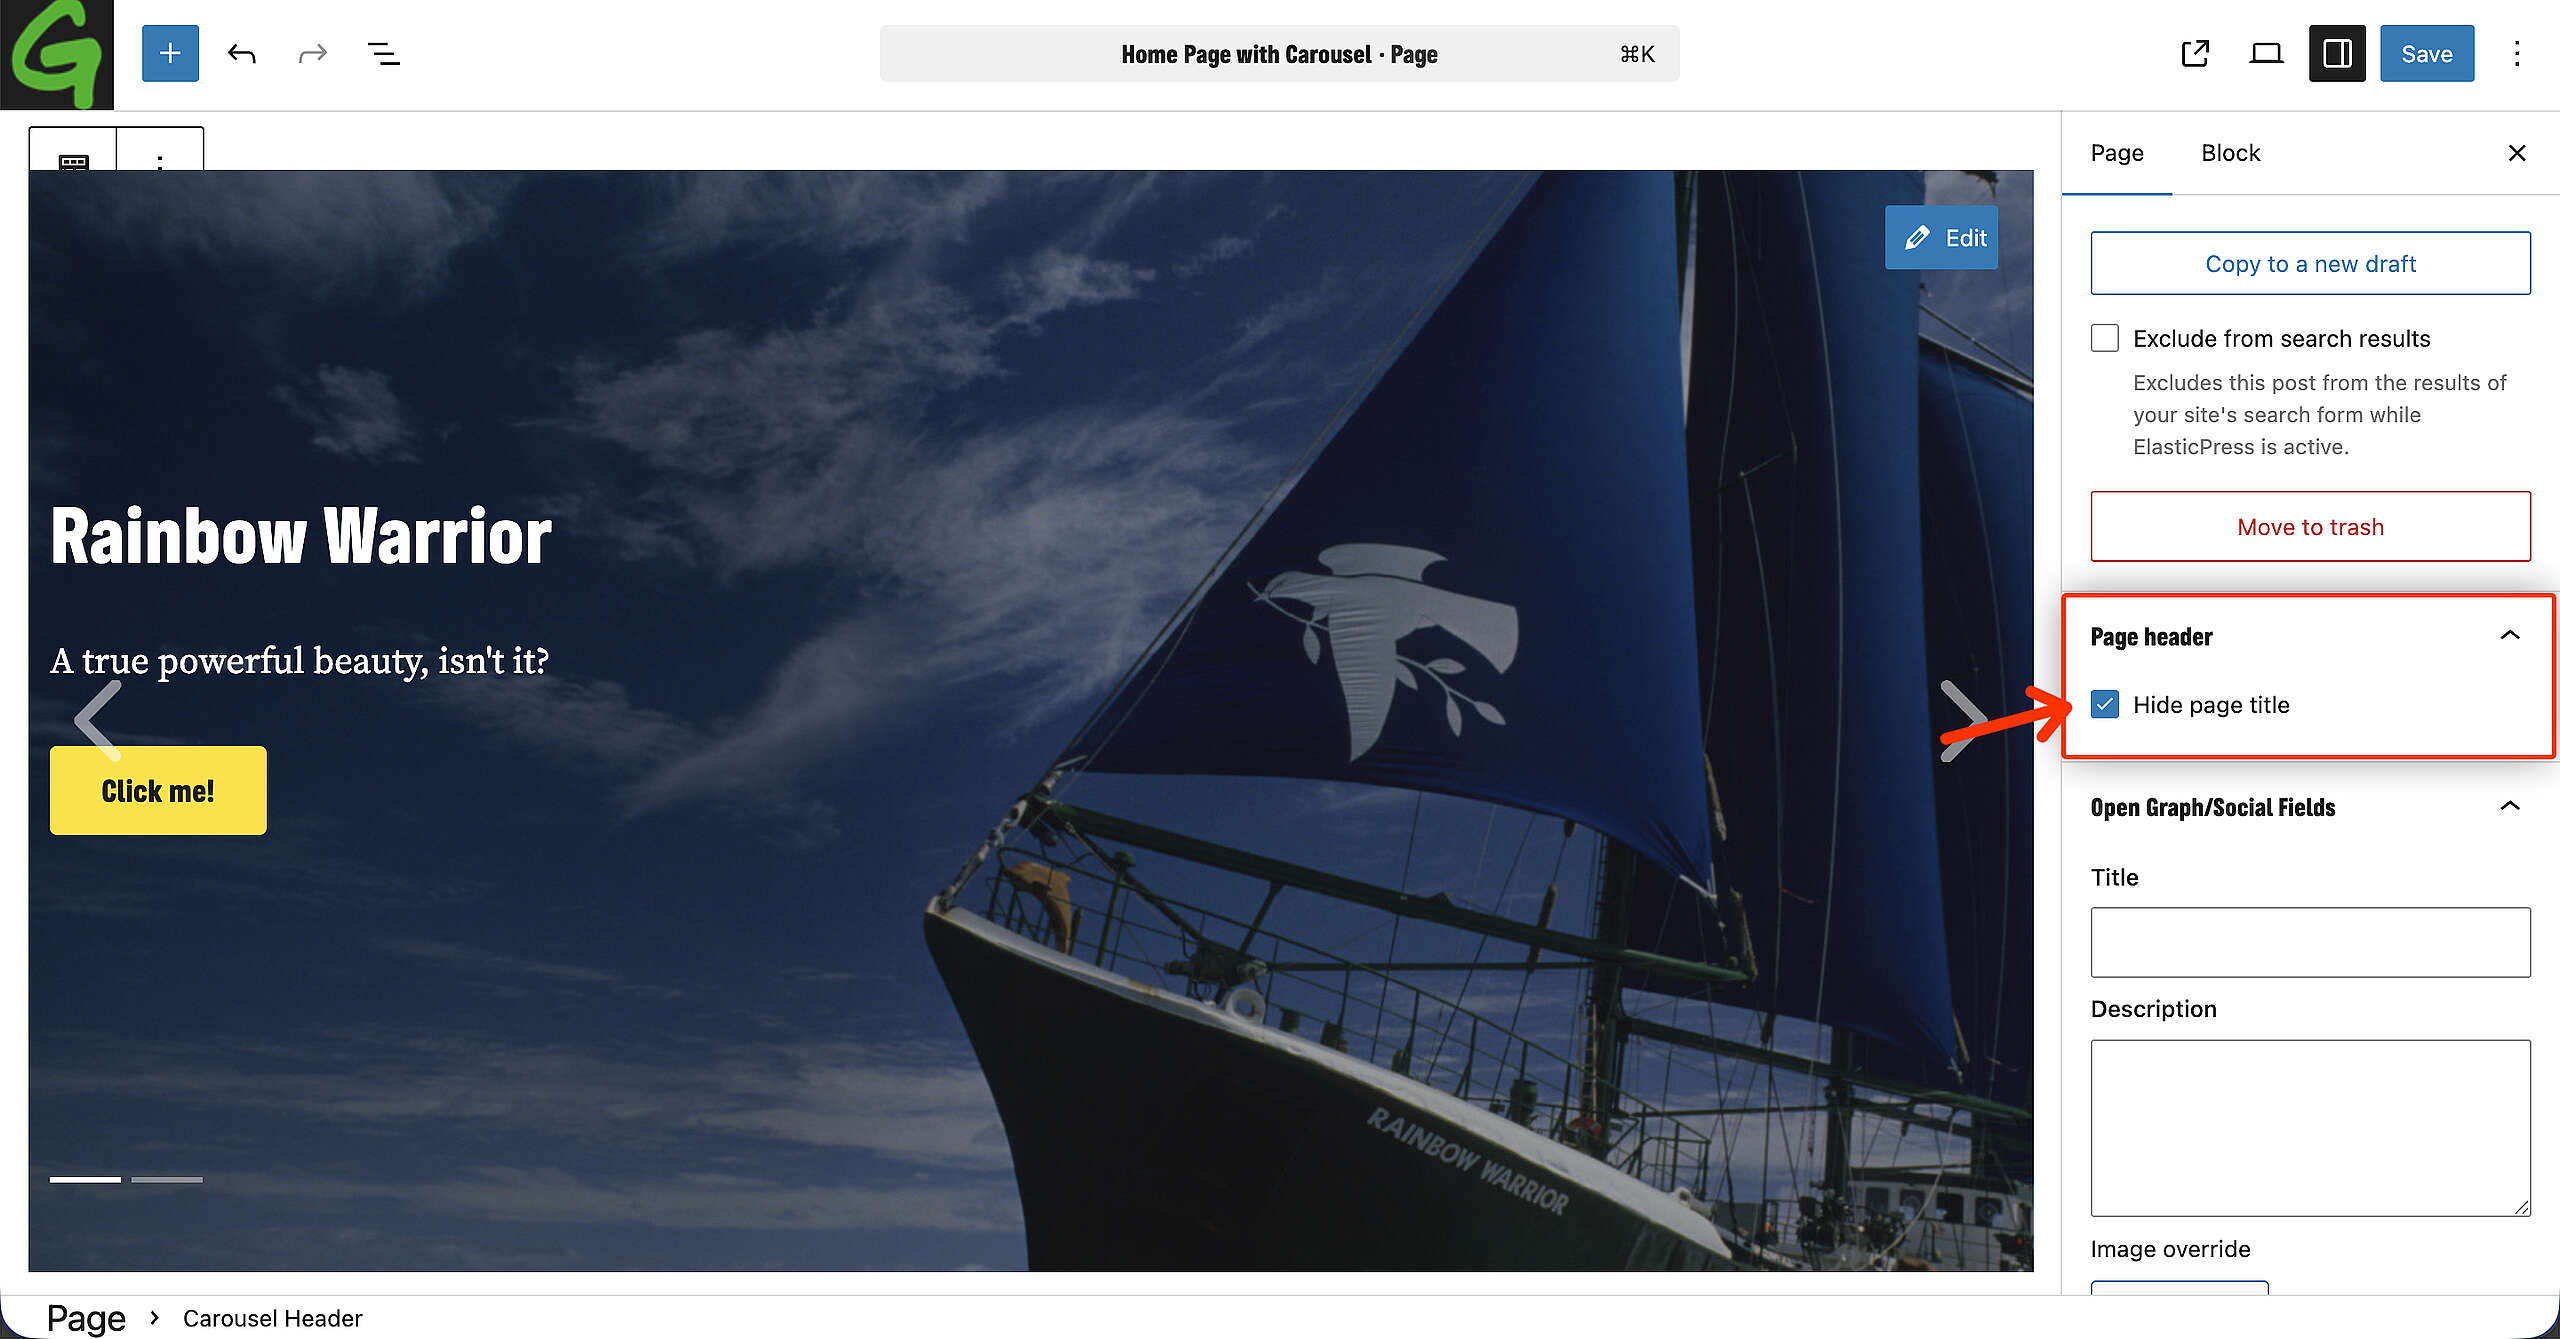
Result
And done! This is how it looks. True beauty indeed.

Small note
Keep in mind you can only add one Carousel Block per page. As soon as you have one, the Block is greyed out in the overview and you can’t add a second Carousel.
Additional Tips
Do’s
You should use as much as possible:
- Simple & clear photos.
- Photos with main subject(s) centred or on the right hand side.
Dont’s
To ensure the text and call to action legibility, you should avoid using as much as possible:
- A photo with a subject (person, animal, object …) on the left hand side.
- A too complex photo with too many subjects (people, animals, objects …).
- A photo that contains text (banners, placards …).