#1 – Shape your P4 Taxonomy
See the step by step guide to creating your new taxonomy. This is a thought-intensive exercise, so take your time and rely on the community to get it right.
|
#2 – Create your P4 sitemap
While auditing your P3 content, you have to determine how P4 will actually be organised, aka determine your sitemap.
|
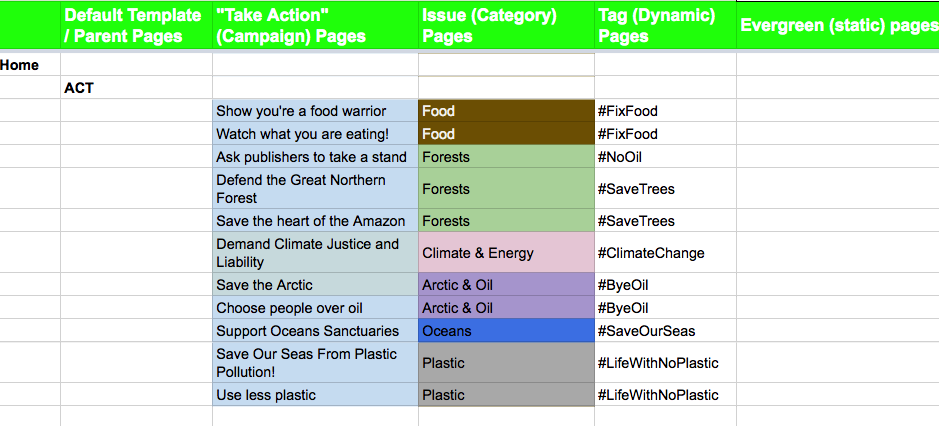
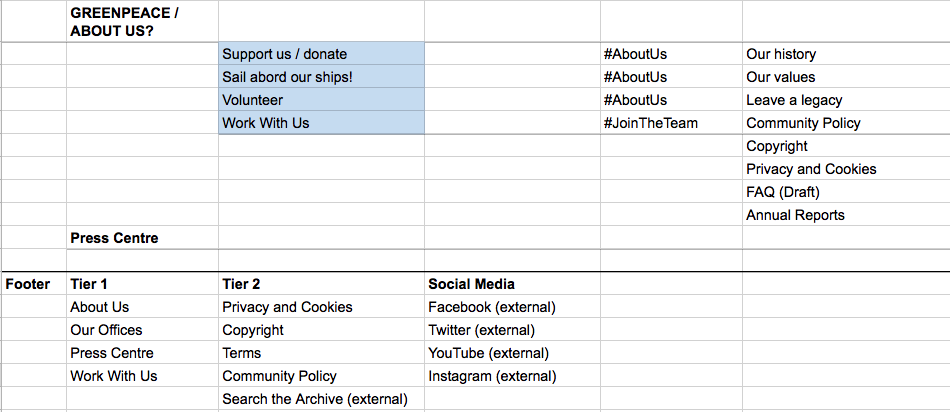
In the “Content Review & Migration” document you will receive, there is a tab named “P4 Sitemap”, which will help you to understand how content will be organised in Planet 4. This exercise will help you understand how the website is organised and how Taxonomy is built.
- The Default Template contains the Parenting page/s, so the pages that will be “one level up” of the others.
- Take Action pages, for example will always have “ACT” as a parent page, and Issue pages will have “EXPLORE” as a parent. This to benefit of the P4 software functionality.
- The “Take Action” pages represents all the ASKS related to a campaign, see “Take Action page“
- The Issue pages represent the broader issue (e.g. “FOOD), and must be associated to Categories – see Taxonomy
- The “Tags” are the fundamental component of P4 organic navigation. Whenever users click on a Tag, they are redirected to dynamically populated pages, which will contain all Take Action, stories, news and publications tagged with the same Tag.
- The “Evergreen” pages are usually used for institutional content, which gets rarely updated or is not related to any specific campaign (e.g. “Our Values”, “Our History” and so on). These pages usually contain text and a few images, but no Take Action Cards or blocks.
Filling this tab will help you visualising your Planet 4 structure, and therefore identify which content you have to migrate, archive or create as new.
See a snapshot of the template below:
#3 – Insert your live sitemap in your P4 site (Footer)
A very cool way to guide users through your content is to insert a sitemap in your Footer (>> set up your Footer)
|
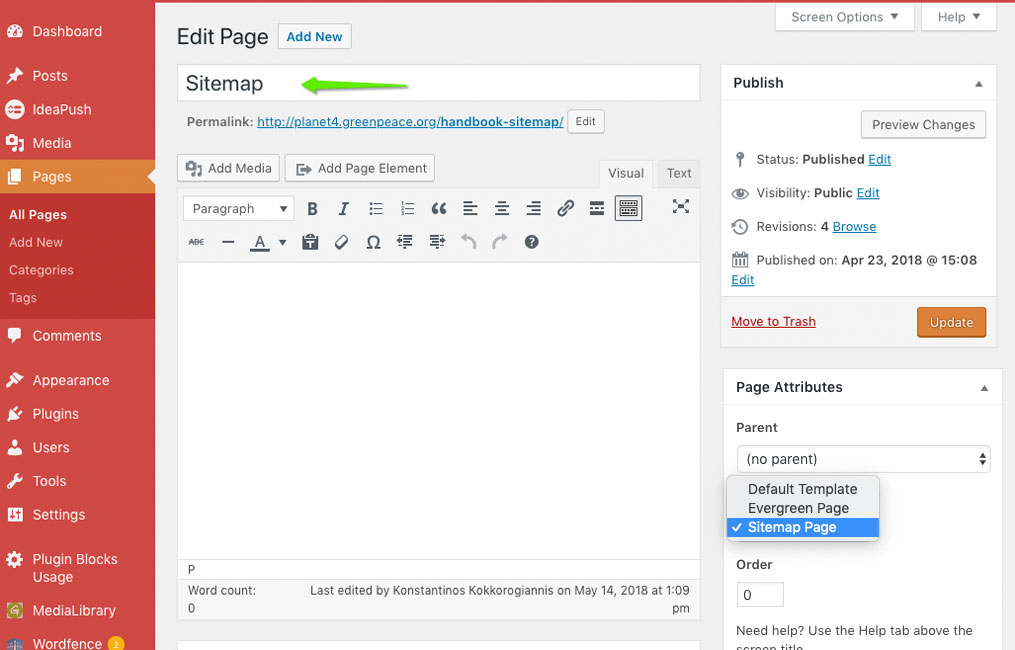
We have a Page layout for the Sitemap, which pulls out your Taxonomy dynamically!
- Create a page
- give it “Sitemap Page” Template
- Publish it
- Insert the Link in your footer (>> set up your Footer)
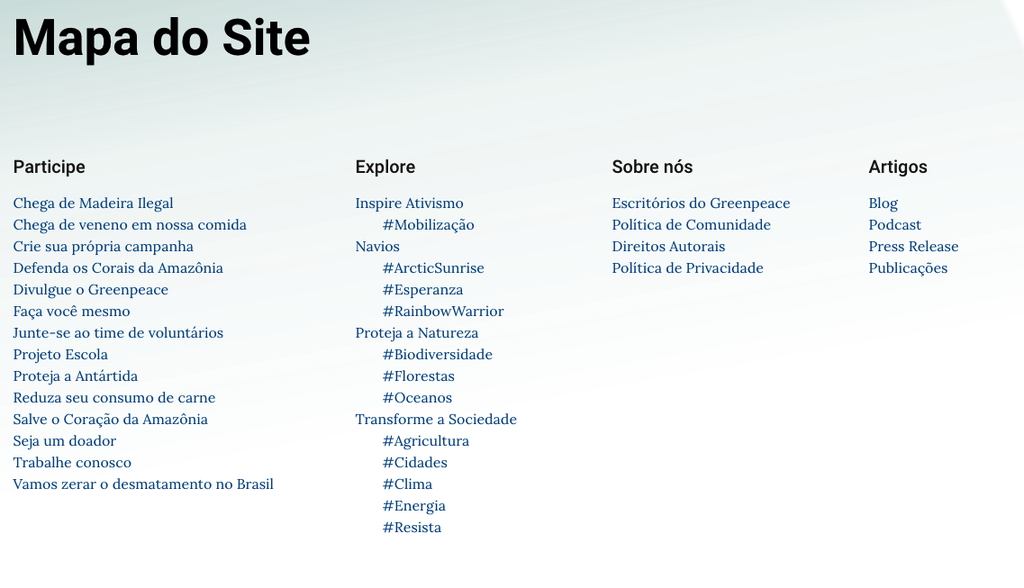
And this is how it looks in the front-end
- Remember to insert the Link in your footer (>> set up your Footer)
The sitemap template currently takes and shows the following data:
- Action pages (criteria: Pages that are children of the defined “Act” page)
- Issue pages (criteria: Pages that are children of the defined “Explore” page and should have the corresponding Tags assigned)
- Tag pages assigned to each issue
- Page types (under the heading “Articles”, with links towards search pages filtered by the different page types)
- Evergreen pages (Under the heading “About Greenpeace”. Criteria: all pages where we have defined the “Evergreen” template.
Links & Resources
- Documentation (accessible to GP Staff – privacy reasons)
- Visual (Post-its) exercise to visualise your sitemap (please create additional pages!)
- GPI Sitemap
- GP Greece sitemap
- GP New Zealand sitemap
- GP Brazil sitemap
- Handbook
- Live P4 Sitemaps


