Implementing via Google Tag Manager
This guide outlines how to add Hotjar via the official Google Tag Manager integration which is suitable for many common Hotjar setups.
Step 1: Go to your Google Tag Manager container and click Add a new tag.
Step 2: Click the tag icon & select Hotjar Tracking Code from the list.

Step 3: Enter your Hotjar Site ID into the text field.
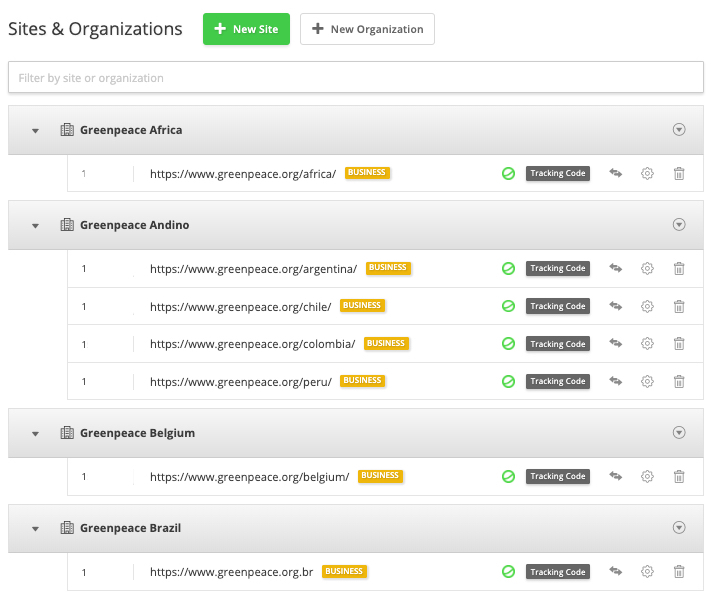
To get your siteID, you can navigate to your Sites & Organizations list from the Settings menu. From here you will see a listing of the Sites and Organizations you have access to, along with their IDs.
Step 4: Setup a trigger to your Hotjar tag.
By default Hotjar was implemented on Planet 4 pages. If you want to use Hotjar in other websites & domains you can change the triggers and fire this tag in other pages.

Step 5: Save and publish your changes.
Step 7: Verify your installation within Hotjar.
Account Settings
Hotjar is one of the Planet 4 supported tools and the P4 team is responsible for the global account management.
Under this account, each Planet 4 website was given a Non-Profit Business License. This license is free of cost and it includes all features. There’s only a limit of 20,000 daily pageviews for each siteID.
Other information:
- Each office’s siteID can be implemented in different domains. You can use the same tracking code in your Planet 4 website (e.g. greenpeace.org/brasil/) and also on your petition/fundraising pages (e.g. doe.greenpeace.org.br).
- If you reach the daily pageviews limit and exceeds the data collection rate, Hotjar will use a sample of the collected data to build the reports. You can find more information here.
- We recommend updating your Privacy Policy. You can find a content suggestion the Greenpeace International website.
This is important for EU-NROs, especially if you start collecting sensitive information via feedback & polls. - Any doubts and questions that you couldn’t find on this page? Try looking at Hotjar’s documentation: https://help.hotjar.com/hc/
Account structure
An Organization represents a legal entity that owns one or more Sites. If you want to add a Site that is owned by a client, you are required to set this up as a separate Organization. This requirement allows Hotjar to sustainably offer ‘unlimited Sites’ to our users.
In this case, each NRO has its own Organization:

Site Settings
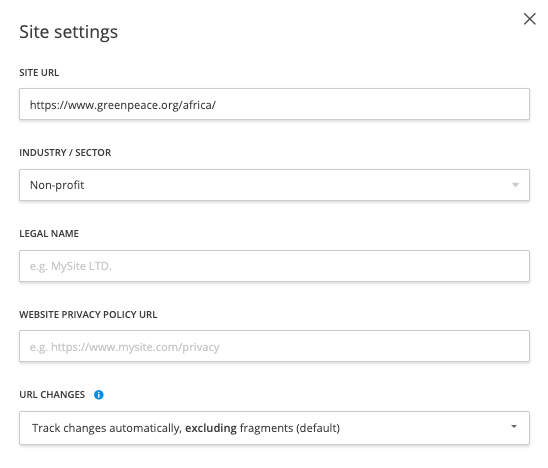
Step 1: Go to the Site & Organizations dashboard and click on the gear icon on the site you’d like to edit.

Step 2: Type the main website URL in the WEBSITE field.
Step 3: Insert your NRO Legal Name
Step 4: Add the link to your Privacy Policy

Privacy, Security and Operations
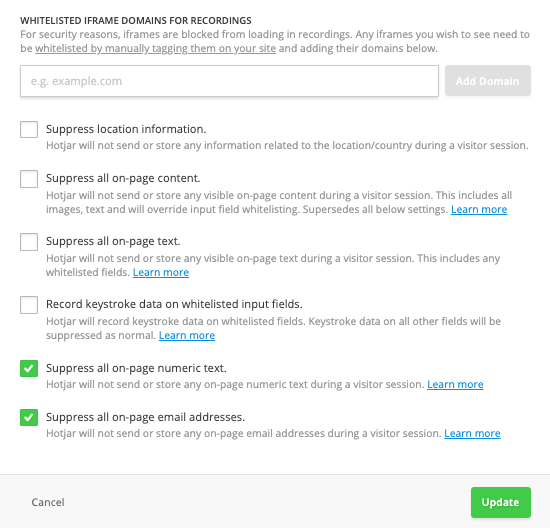
Hotjar offers options to suppress all text-based on-page numbers and email addresses, input fields, and some text within Heatmaps, Recordings and Feedback widgets.
Step 1: Go to the Site & Organizations dashboard and click on the gear icon on the site you’d like to edit.
Step 2: Check the boxes for the type of suppression you’d like to activate.

Important: Whitelisting takes priority over on-page text suppression
If a text field that is whitelisted contains a number or email address, the text will be shown on Recordings, Heatmap, and Incoming Feedback screenshots even if on-page text suppression is turned on.
You can learn more about whitelisting in our Whitelisting Input Fields article.
Types of Suppression:
- All On-Page Text Suppression:
Replaces all on-page text with asterisks in Heatmaps, Recordings, and Incoming Feedback.

- All On-Page Content Suppression:
Blocks all page content (images and text) from appearing in Heatmaps, Recordings, and Incoming Feedback.

User Management
Users are added and managed on the organization level (NRO).
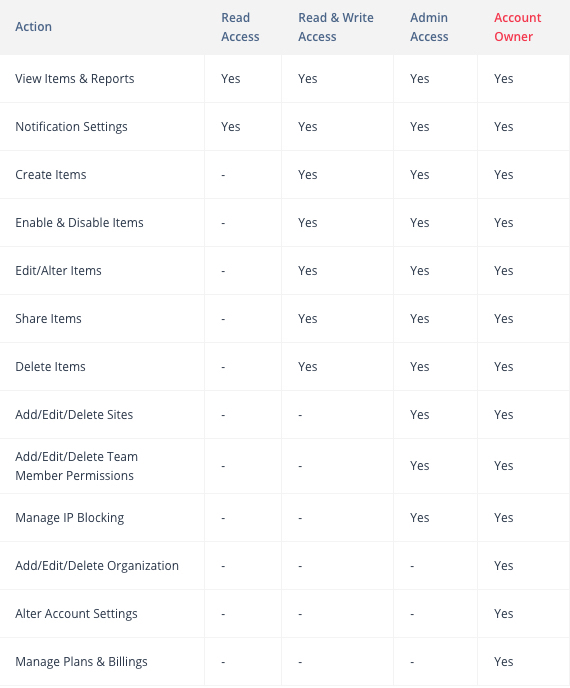
When inviting people, you can choose between Read Only, Read & Write, and Admin access. The User Permissions document can help determine what access level is best for the user being added.
Step 1: Click on Add team members.

Step 2: Choose the organization and start inviting people.

Once the invite is sent, the new team member will not show up on your Organization’s team member list until they accept the invitation email.
How to Edit User Permissions
When you want to remove an existing Team Member’s access to an Organization and all of its Sites, you can revoke their access by following these steps:
Step 1: Click on Settings > Team to access the Team page.
Step 2: Click on the revoke “X” icon on the right-hand side of the Team Member to remove access.

Team Member Permissions
Unless you are invited to join an Organization, once you have set up an account on Hotjar, you will automatically become the Account Owner.
As an Account Owner or Admin, you can invite your colleagues and clients to the Organizations you create with either Read Only, Read & Write, or Admin permissions.

