Purpose: Web editors can now add in Pages, Posts and Campaigns uniquely styled tables and Google Spreadsheets, listing a series of data with the P4 layout or campaign branding.
Important: For the “Spreadsheet Block, the source Spreadsheet must be published to render in P4 pages
Table Block
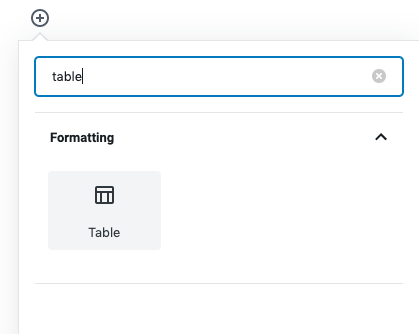
The Table block is a native Gutenberg block, allowing editors to include standard, responsive tables within Posts or Pages. You can add it by looking for “Table” in the Blocks option, under Formatting
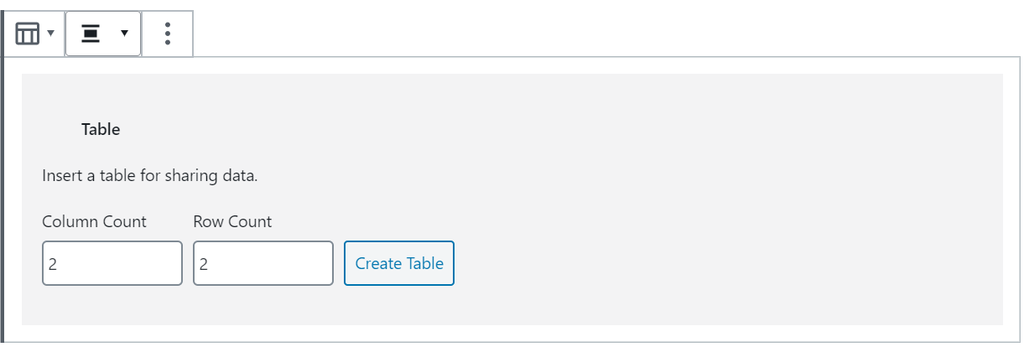
Once added you can insert as many rows and columns as you wish, see a live example below.
| Default style 🙂 | Title | Title | Title | Title | Title |
|---|---|---|---|---|---|
| Row 1 | cell | cell | cell | cell | cell |
| Row 2 | cell | cell | cell | ||
| Row 3 | cell | cell | cell |
Customize the table
Once inserted, you can change the appearance of the Table block using the commands on the right-side of your page / post.
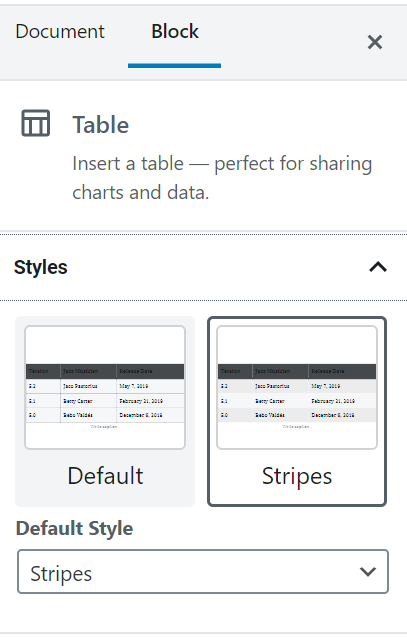
Styles: You can select between “Default” (see table above), and Stripes (see below). The primary colour won’t change
Settings: You can decide whether to have a fixed width of the cell, have a Header row (which looks different from the other rows) and the footer section. See below how all 3 of these settings look like when activated
| Header is the blue Stripe 🙂 | Title | Title | Title | Title | Title |
|---|---|---|---|---|---|
| Row | cell | cell | cell | cell | cell |
| Footer row! |
Content: you can obviously add or remove rows in the block commands, in the rich text add sub/superscripts, inline images or HTML code see below
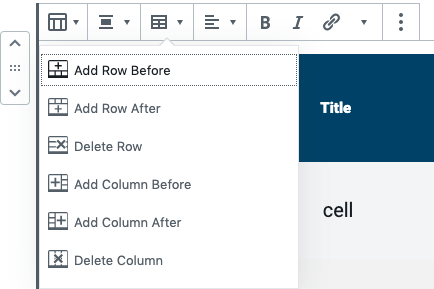
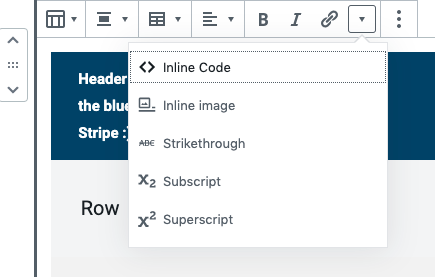
Table background colours
There are three colour options – Grey (Default), Green and Blue. There are two styles – Stripes (shown below) and plain. Plain use the light table colour and white horizontal dividers.
Grey table (Default)
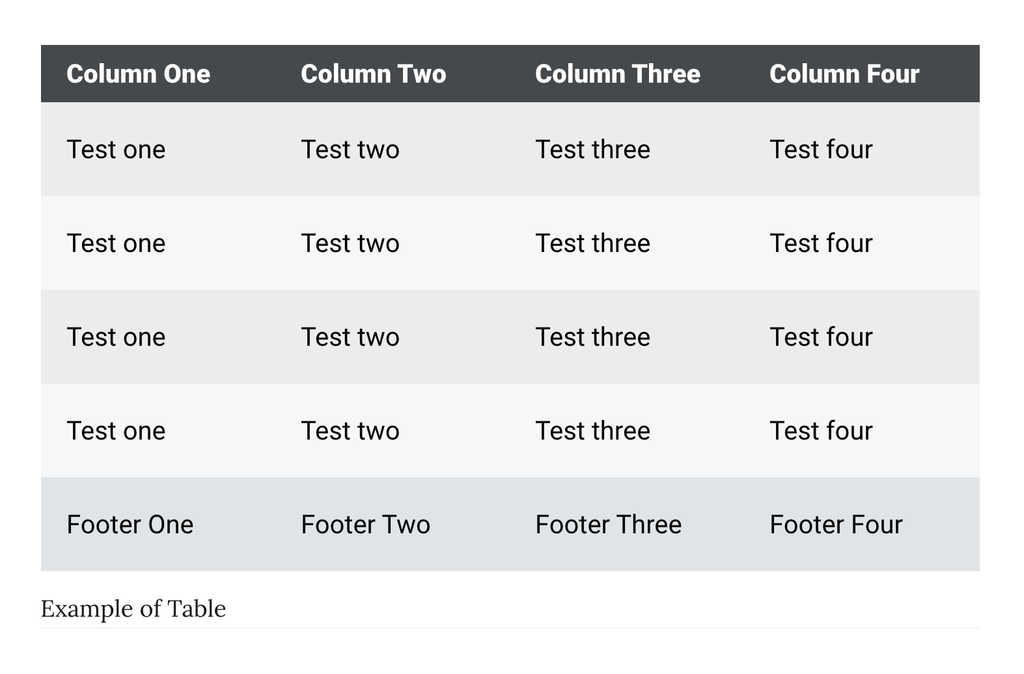
- Table rows: #F5F7F8 (Text colour – #020202)
- Odd table rows: #ECECEC (Text colour – #020202)
- Header background: #45494C (Text colour – #FFFFFF)
- Footer background: #E0E4E7 (Text colour – #020202)
Green table
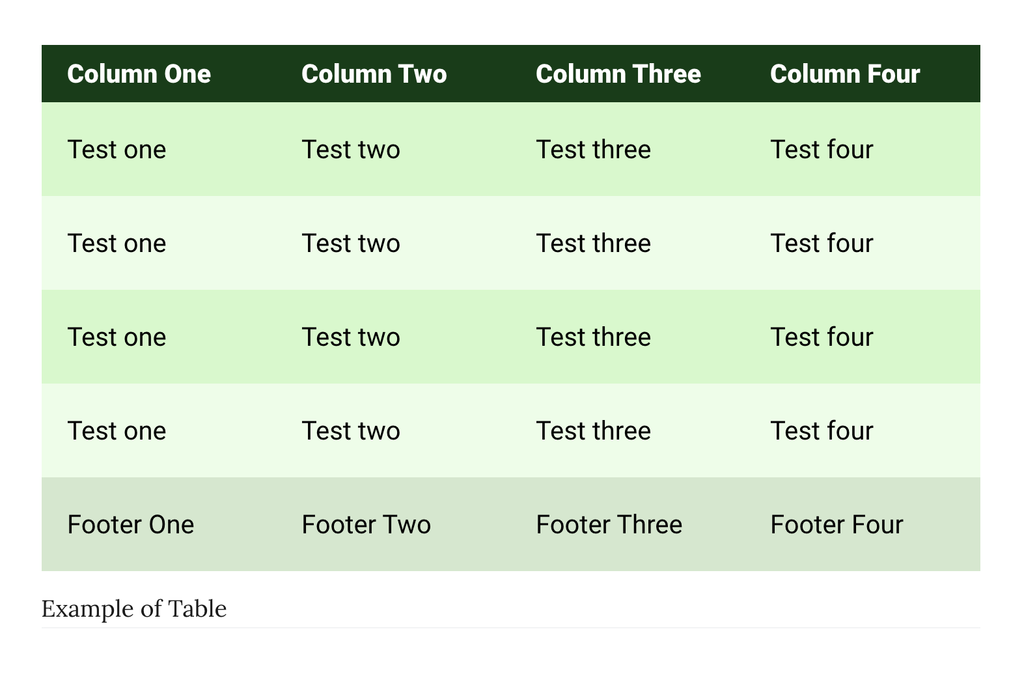
- Table rows: #EAFEE7 (Text colour – #020202)
- Odd table rows: #D0FAC9 (Text colour – #020202)
- Header background: #073D14 (Text colour – #FFFFFF)
- Footer background: #D1E8CD (Text colour – #020202)
Blue table
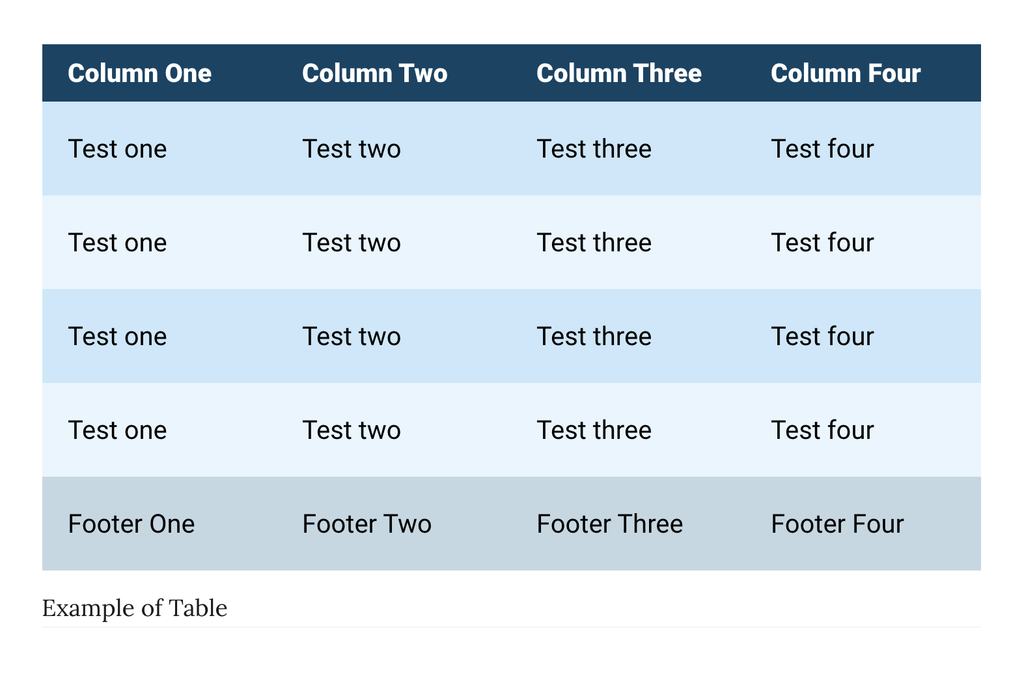
- Table rows: #E7F5FE (Text colour – #020202)
- Odd table rows: #C9E7FA (Text colour – #020202)
- Header background: #074365 (Text colour – #FFFFFF)
- Footer background: #C3D7E2 (Text colour – #020202)
Spreadsheet Block
This block allows you to embed Google Spreadsheets right into your P4 posts, pages and campaigns.
To insert your block, search for “Spreadsheet” among the Planet 4 Blocks
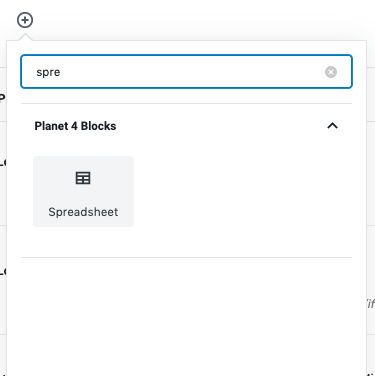
The Editor will then ask you the link to a Google Spreadsheet, you will get that link by selecting File -> Publish on web.
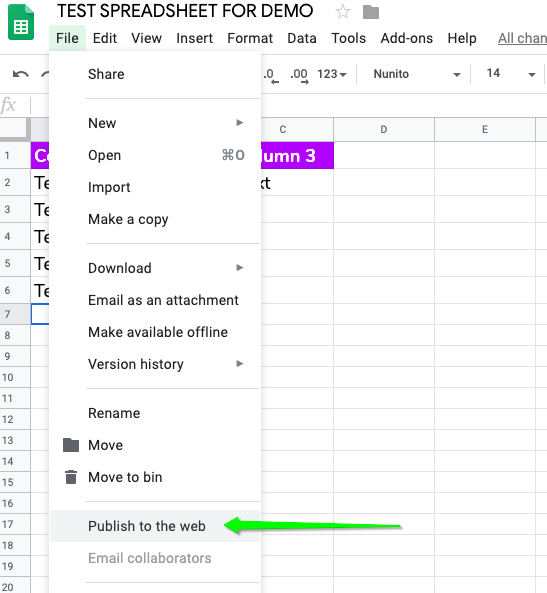
KEY INFO – to display the content, the Spreadsheet must be set as “Public on the web”.
You can use this file as template 🙂
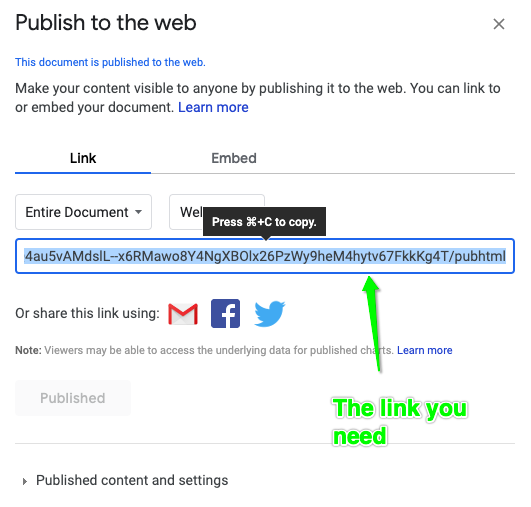
No need to choose the output format, any of them will work in the Spreadsheet block. Once you got the link, just paste it in the block settings, you should get an immediate preview, see below.
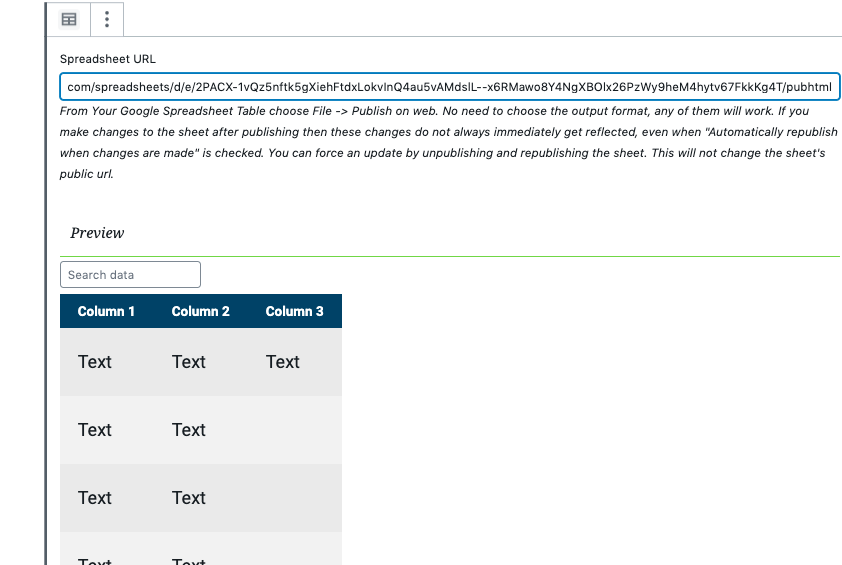
If you make changes to the sheet after publishing it, these changes do not always immediately get reflected, even when “Automatically republish when changes are made” is checked. It may take a few minutes.
You can force an update by unpublishing and republishing the sheet. This will not change the sheet’s public url.
Features of the Spreadsheet block
Sorting
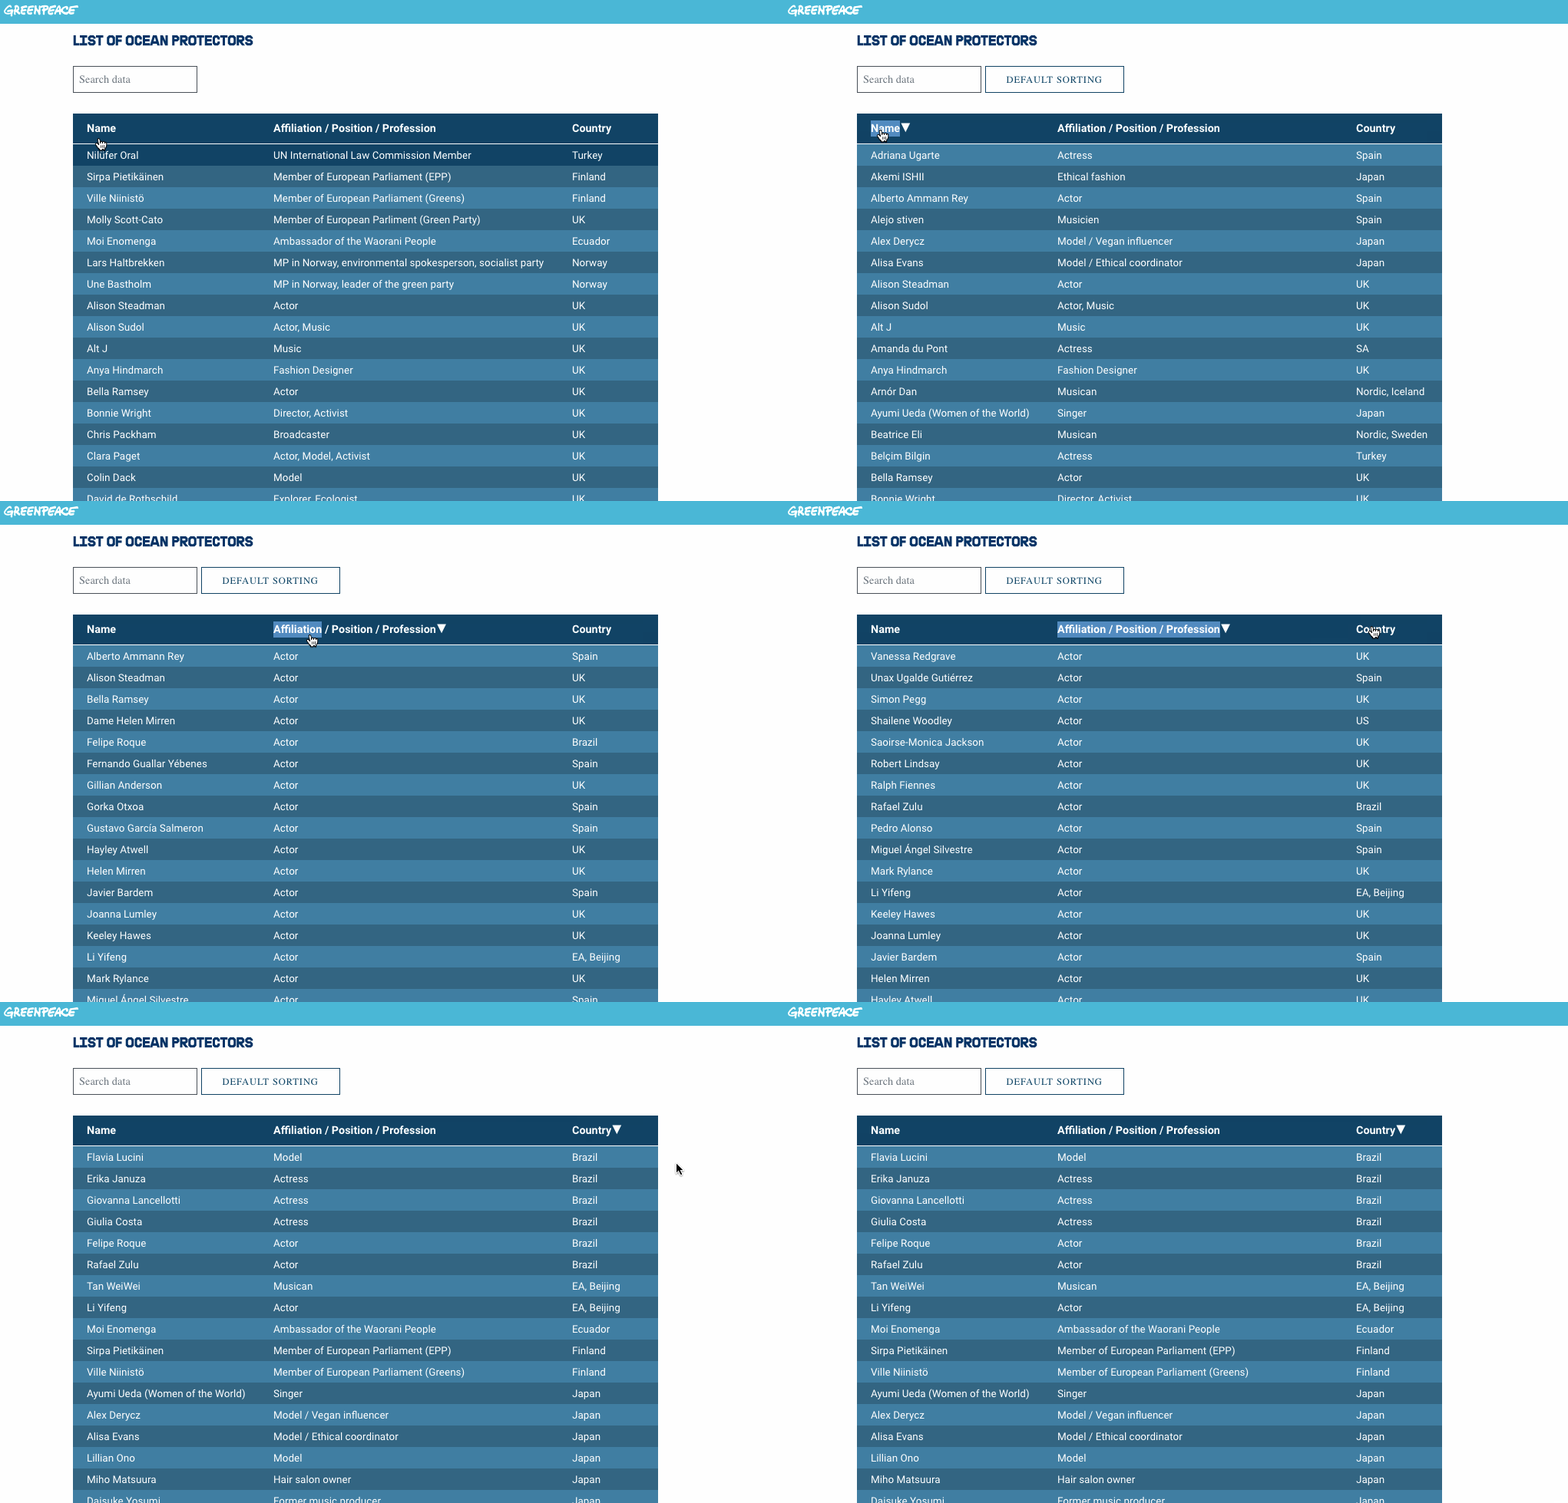
By clicking on each column, users will be able to sort the content of the Spreadsheet block, see .gif below.
Search
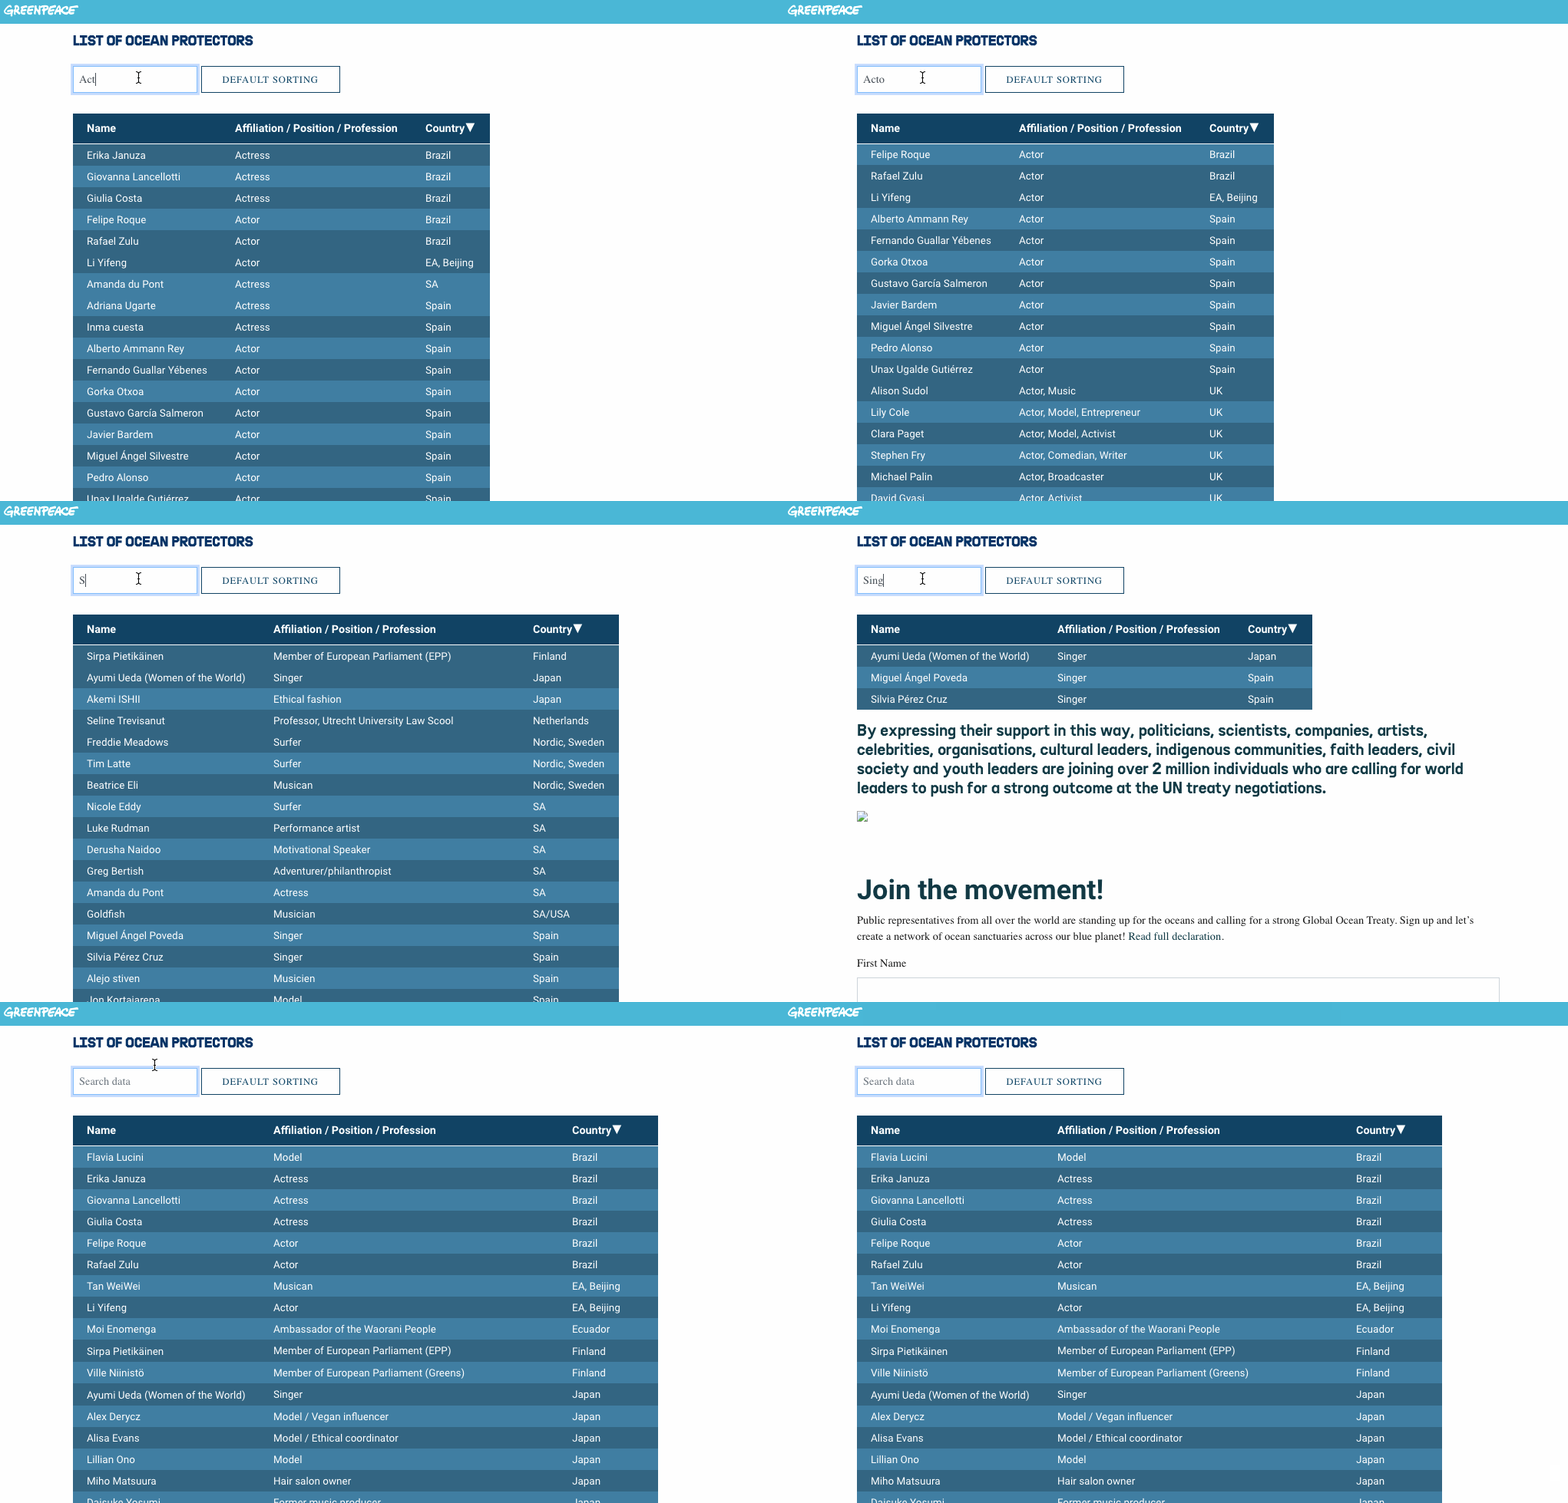
In the search bar, users will be able to search for content, immediately sorting the table in real time, see .gif below.
Styles of the Spreadsheet block
All P4 and P4CG Spreadsheet blocks have three colour options. Grey (default), Green and Blue.
Grey Layout (Default)
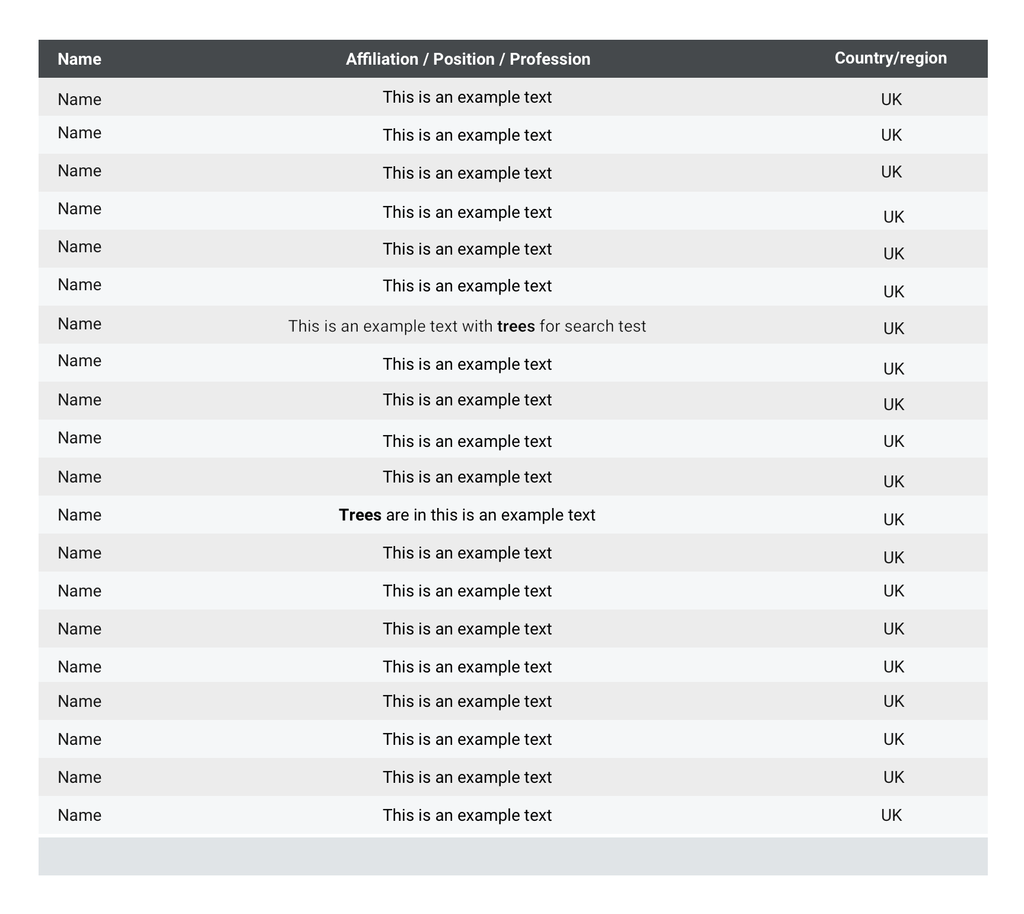
- Rendering like a “secondary” button in P4 posts and pages, the Spreadsheet block will have the default Table Grey layout (see above).
- Table rows: #F5F7F8 (Text colour – #020202)
- Odd table rows: #ECECEC (Text colour – #020202)
- Header background: #45494C (Text colour – #FFFFFF)
- Footer background: #E0E4E7 (Text colour – #020202)
Green Layout
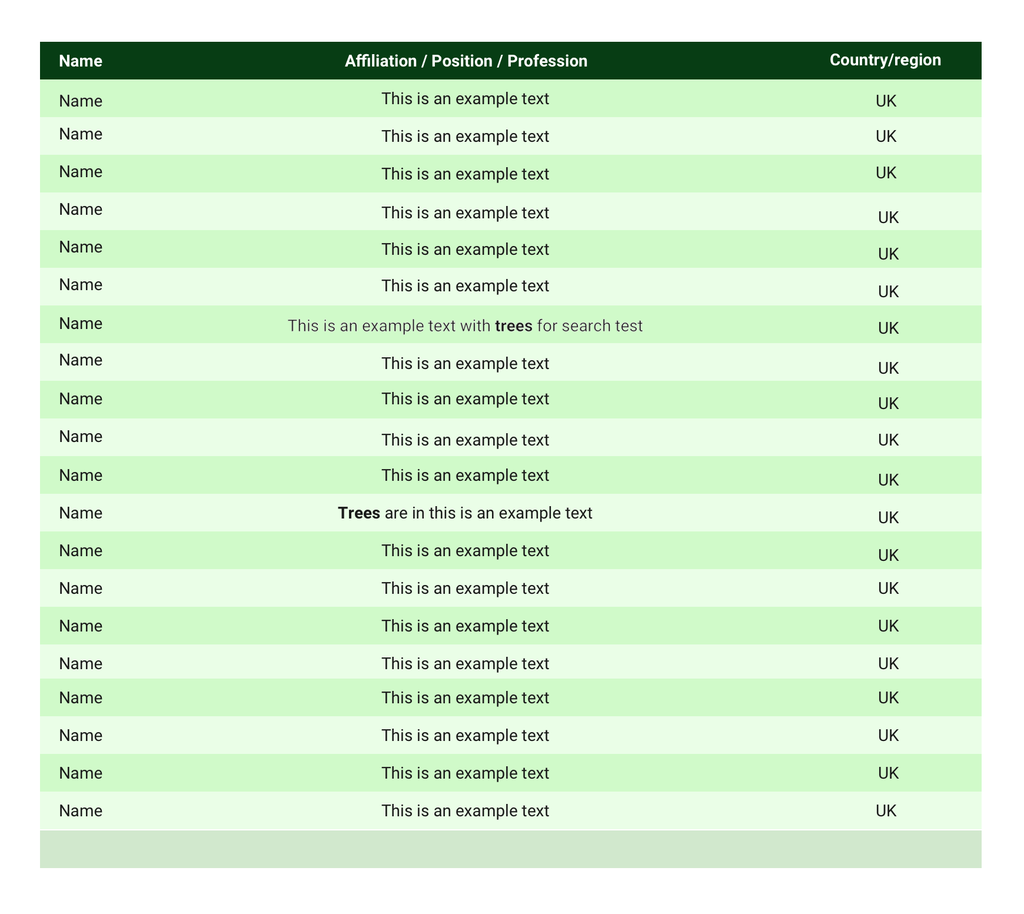
- Table rows: #EAFEE7 (Text colour – #020202)
- Odd table rows: #D0FAC9 (Text colour – #020202)
- Header background: #073D14 (Text colour – #FFFFFF)
- Footer background: #D1E8CD (Text colour – #020202)
Blue Layout
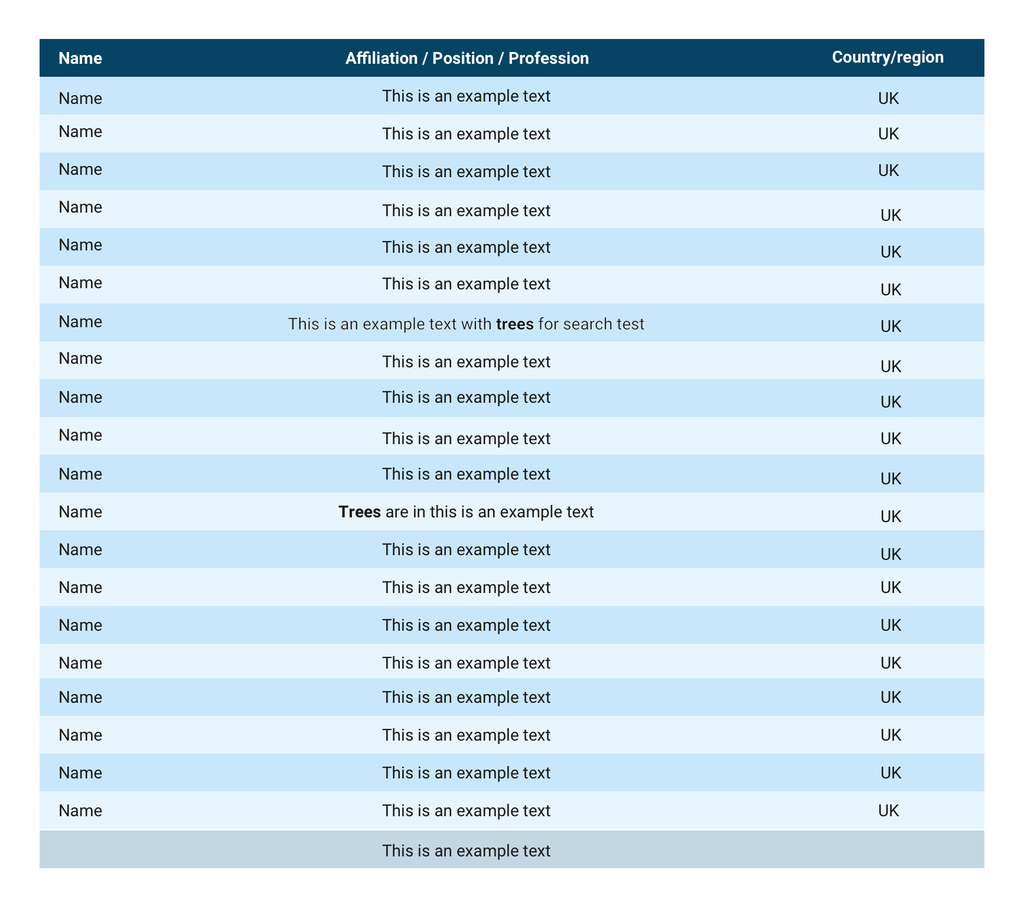
- Table rows: #E7F5FE (Text colour – #020202)
- Odd table rows: #C9E7FA (Text colour – #020202)
- Header background: #074365 (Text colour – #FFFFFF)
- Footer background: #C3D7E2 (Text colour – #020202)
Design Elements
All design files of the block are available in the P4 Design Systems > Blocks > Spreadsheet
Links & resources
Handbook:
External links:

