If the planet4 site deployed needs to support many languages then probably WPML plugin has been installed. The guide below demonstrates the initial setup of the WPML plugin in a new planet4 installation
NOTE: Instructions are written for wpml 4.0.6 version. There may be slight variations in a newer/older version.
In the admin area of the planet4 site.
- Click on ‘WPML’ at the left sidebar. This will navigate you to the initial plugin setup.
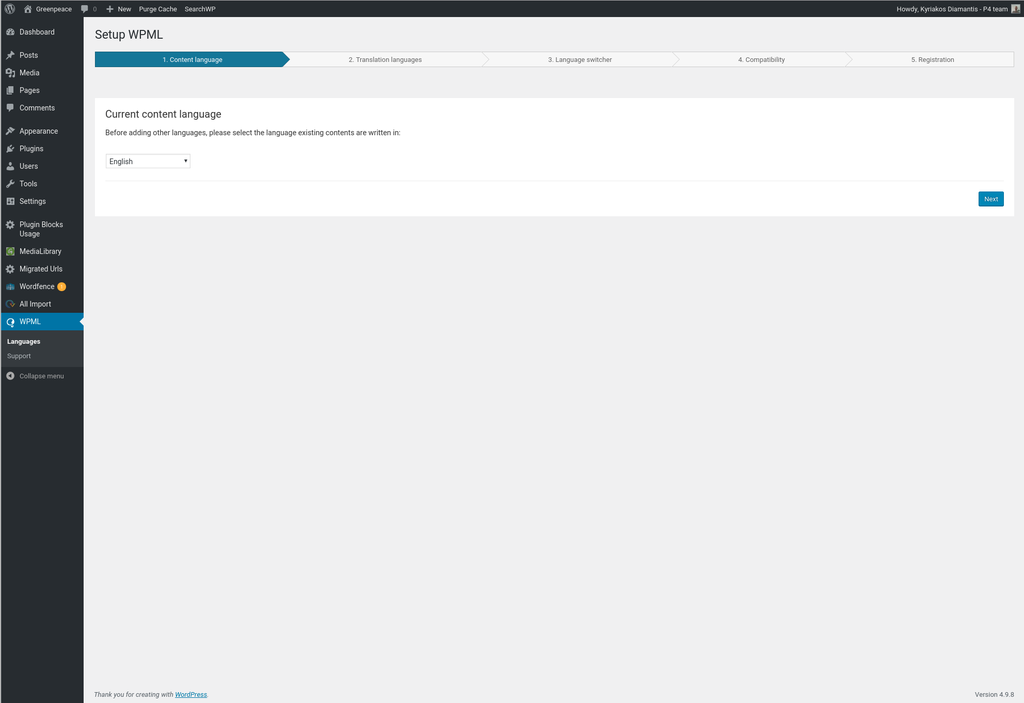
- Select the language of the posts.
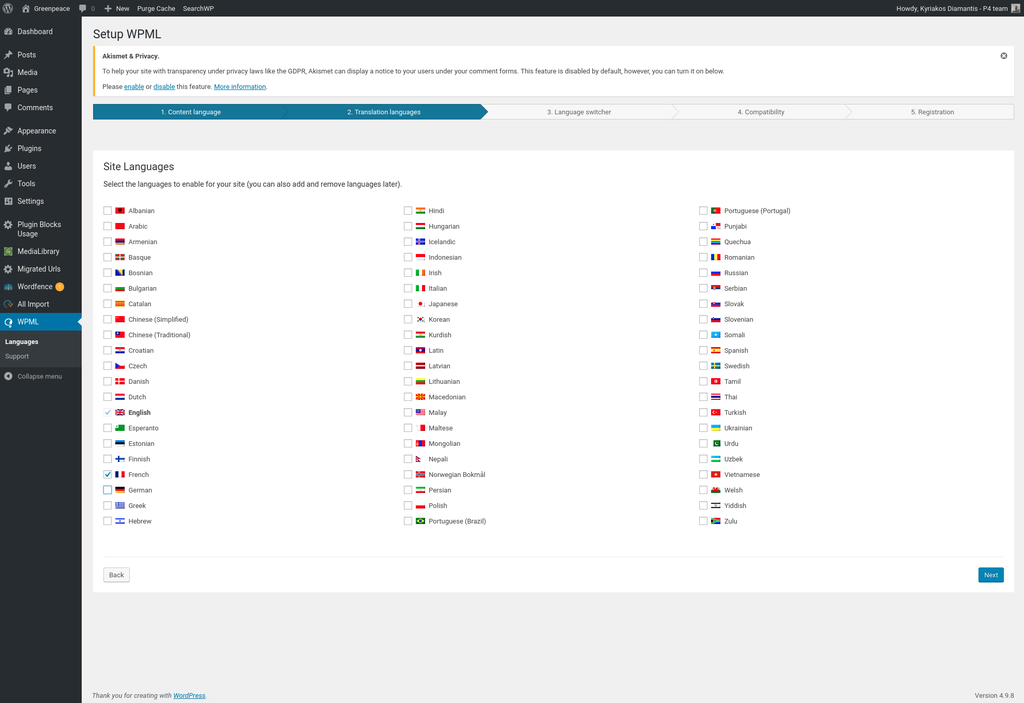
- Select which languages want to the site to support and click Next.
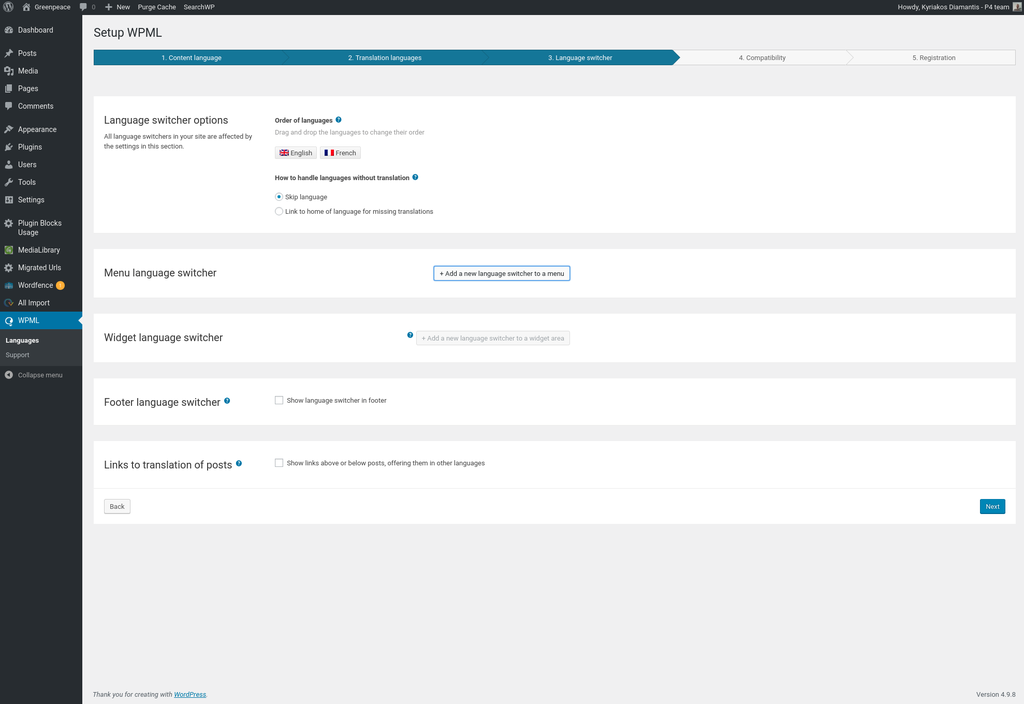
- Step 3. Add a new language switcher to the theme. Press ‘Add a new language switcher to a menu’.
- Select ‘Navigation Bar Menu’ from the menu select box.
- Select ‘First Item’ in Position radios.
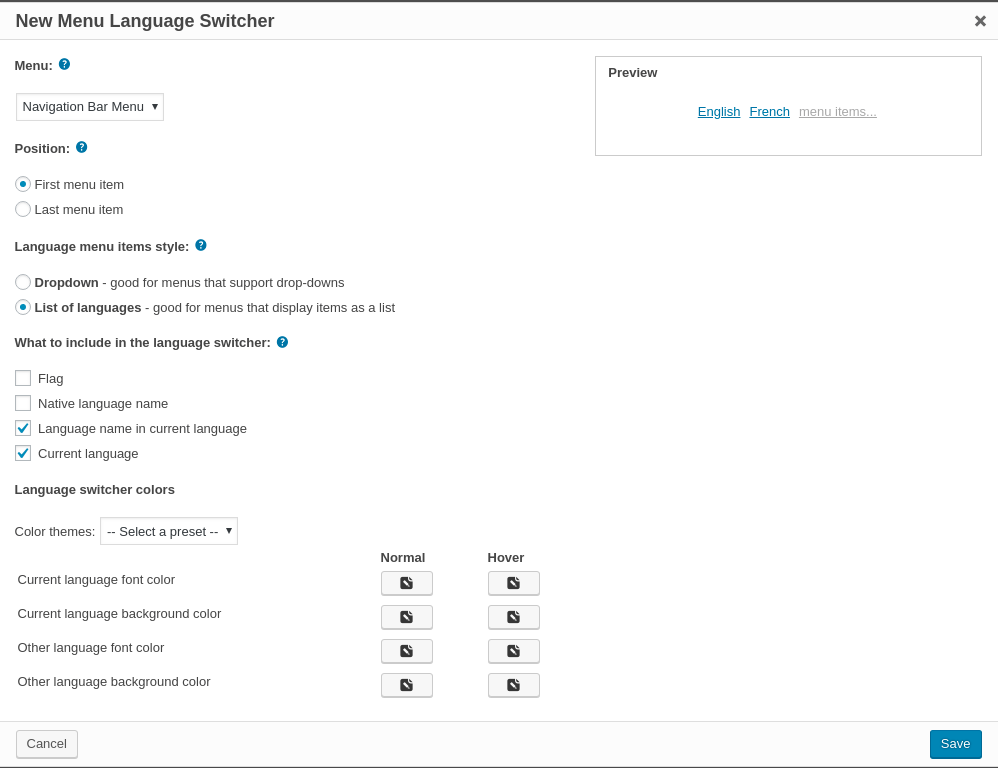
- Select ‘List of Languages’ in Language menu items style.
- Select ‘Language name in current language’ and ‘Current language’ options in ‘What to include in the language switcher’.
- Click save.
- In step 4 select 2nd option and click Next.
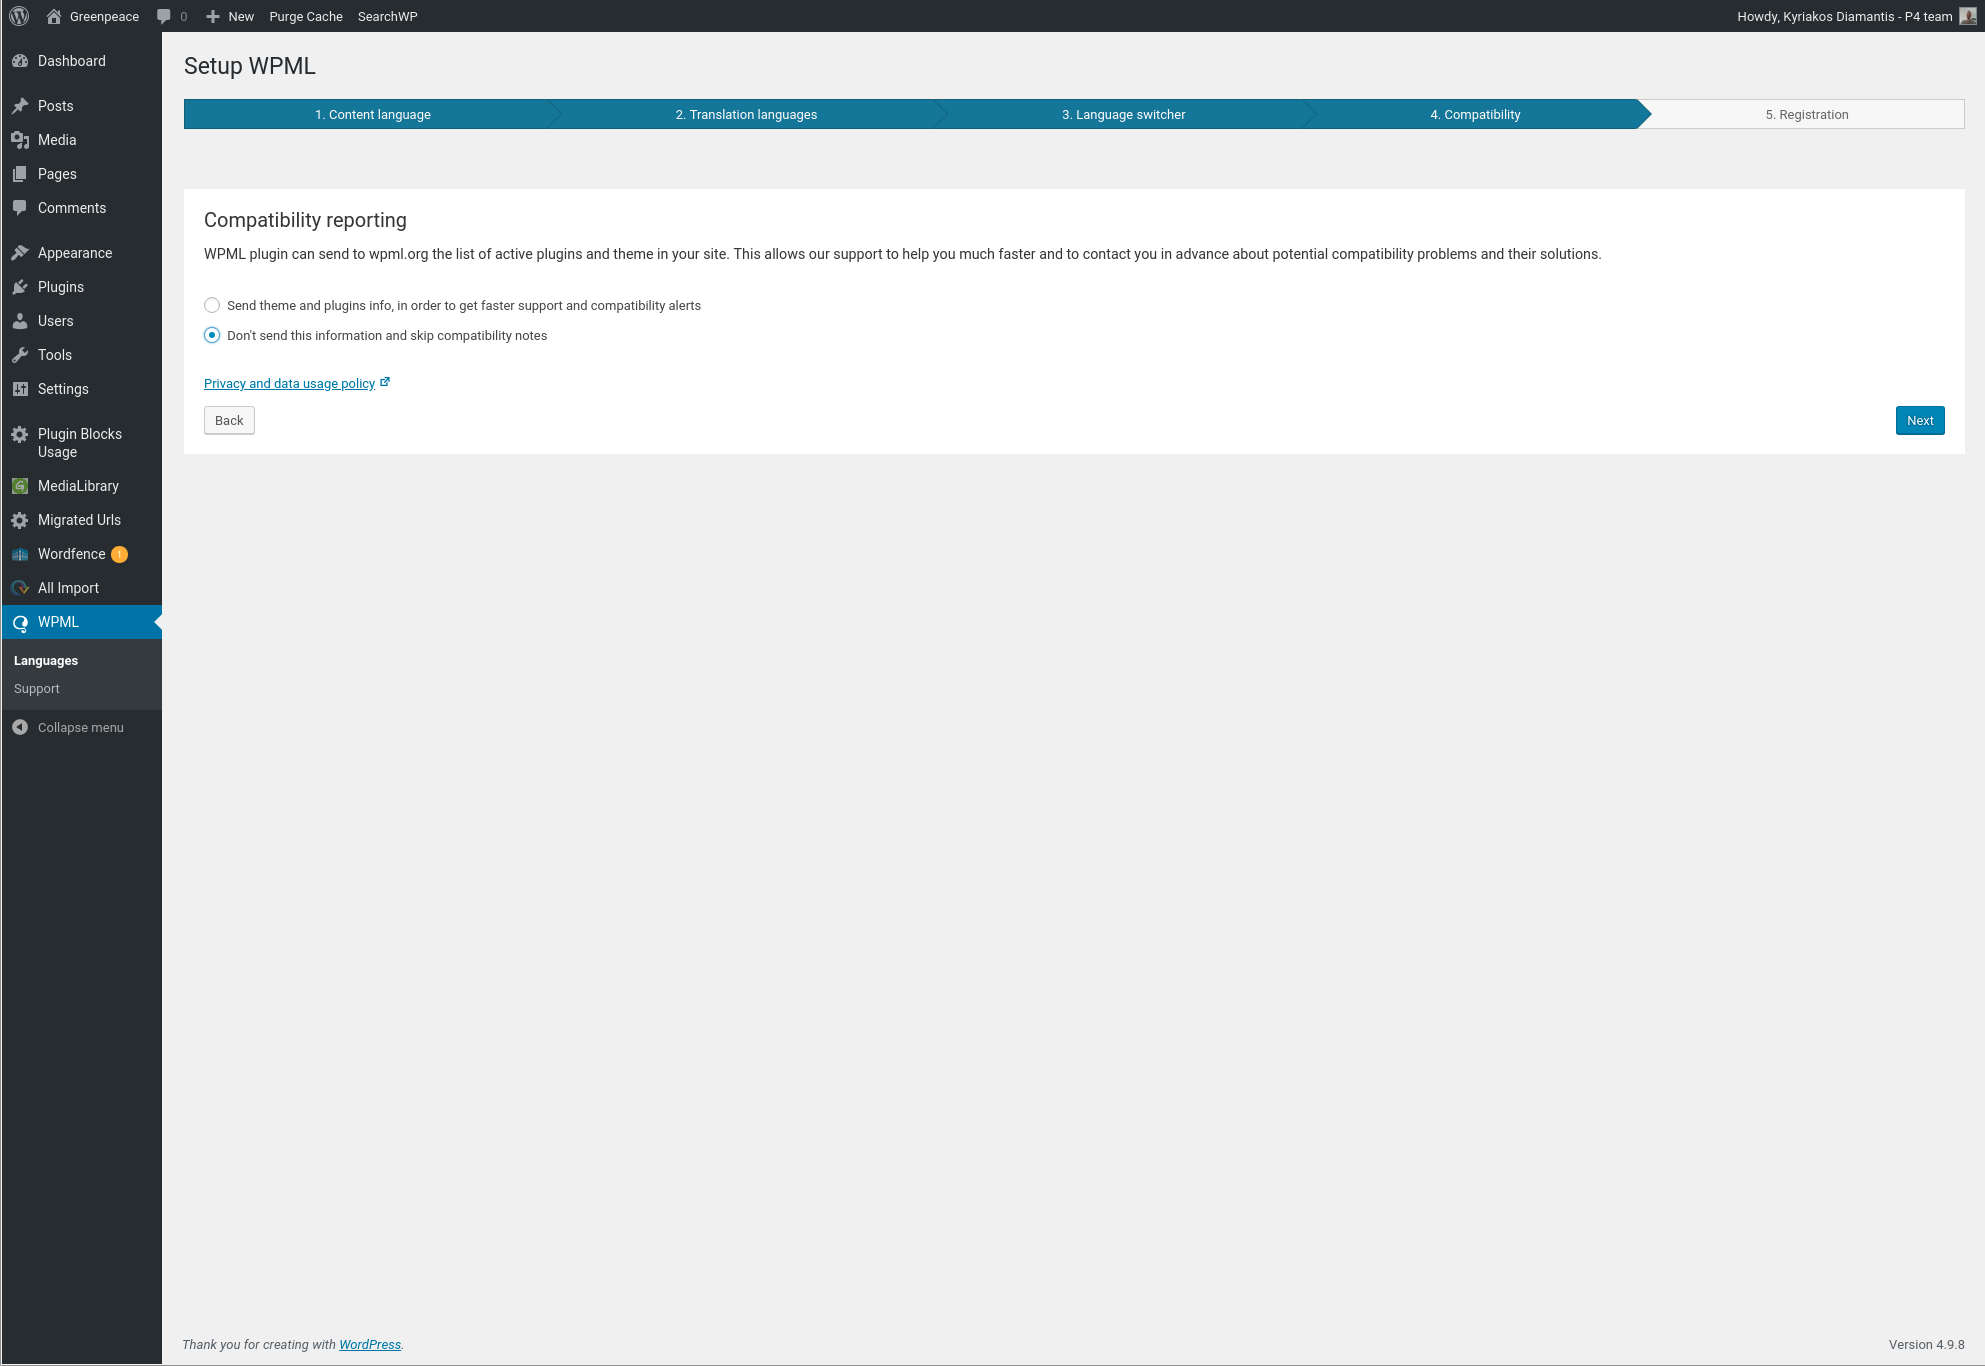
- In step 5 you need to generate a new site key for wpml (to support plugin updates). Go to https://wpml.org/account/sites/
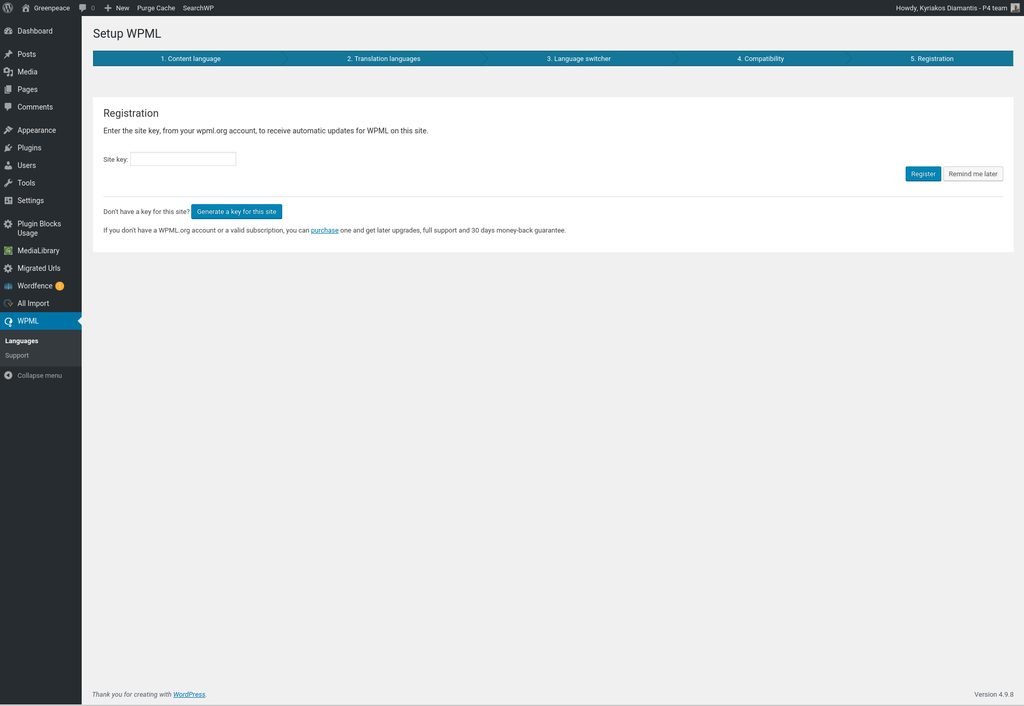
- Create a new wpml ’Site key’ and enter it finish the setup.
Initial configuration for the multingual plugin has been completed!
After the initial configuration has finished, there is an extra setting that should be done in order to set the proper format for urls/permalinks.
- Navigate to WPML -> Languages (1st list item in wpml menu).
- In the third section (‘Language url format‘) select the 1st option (‘Different languages in directories‘) and the checkbox ‘Use directory for default language‘
and click ‘Save’.
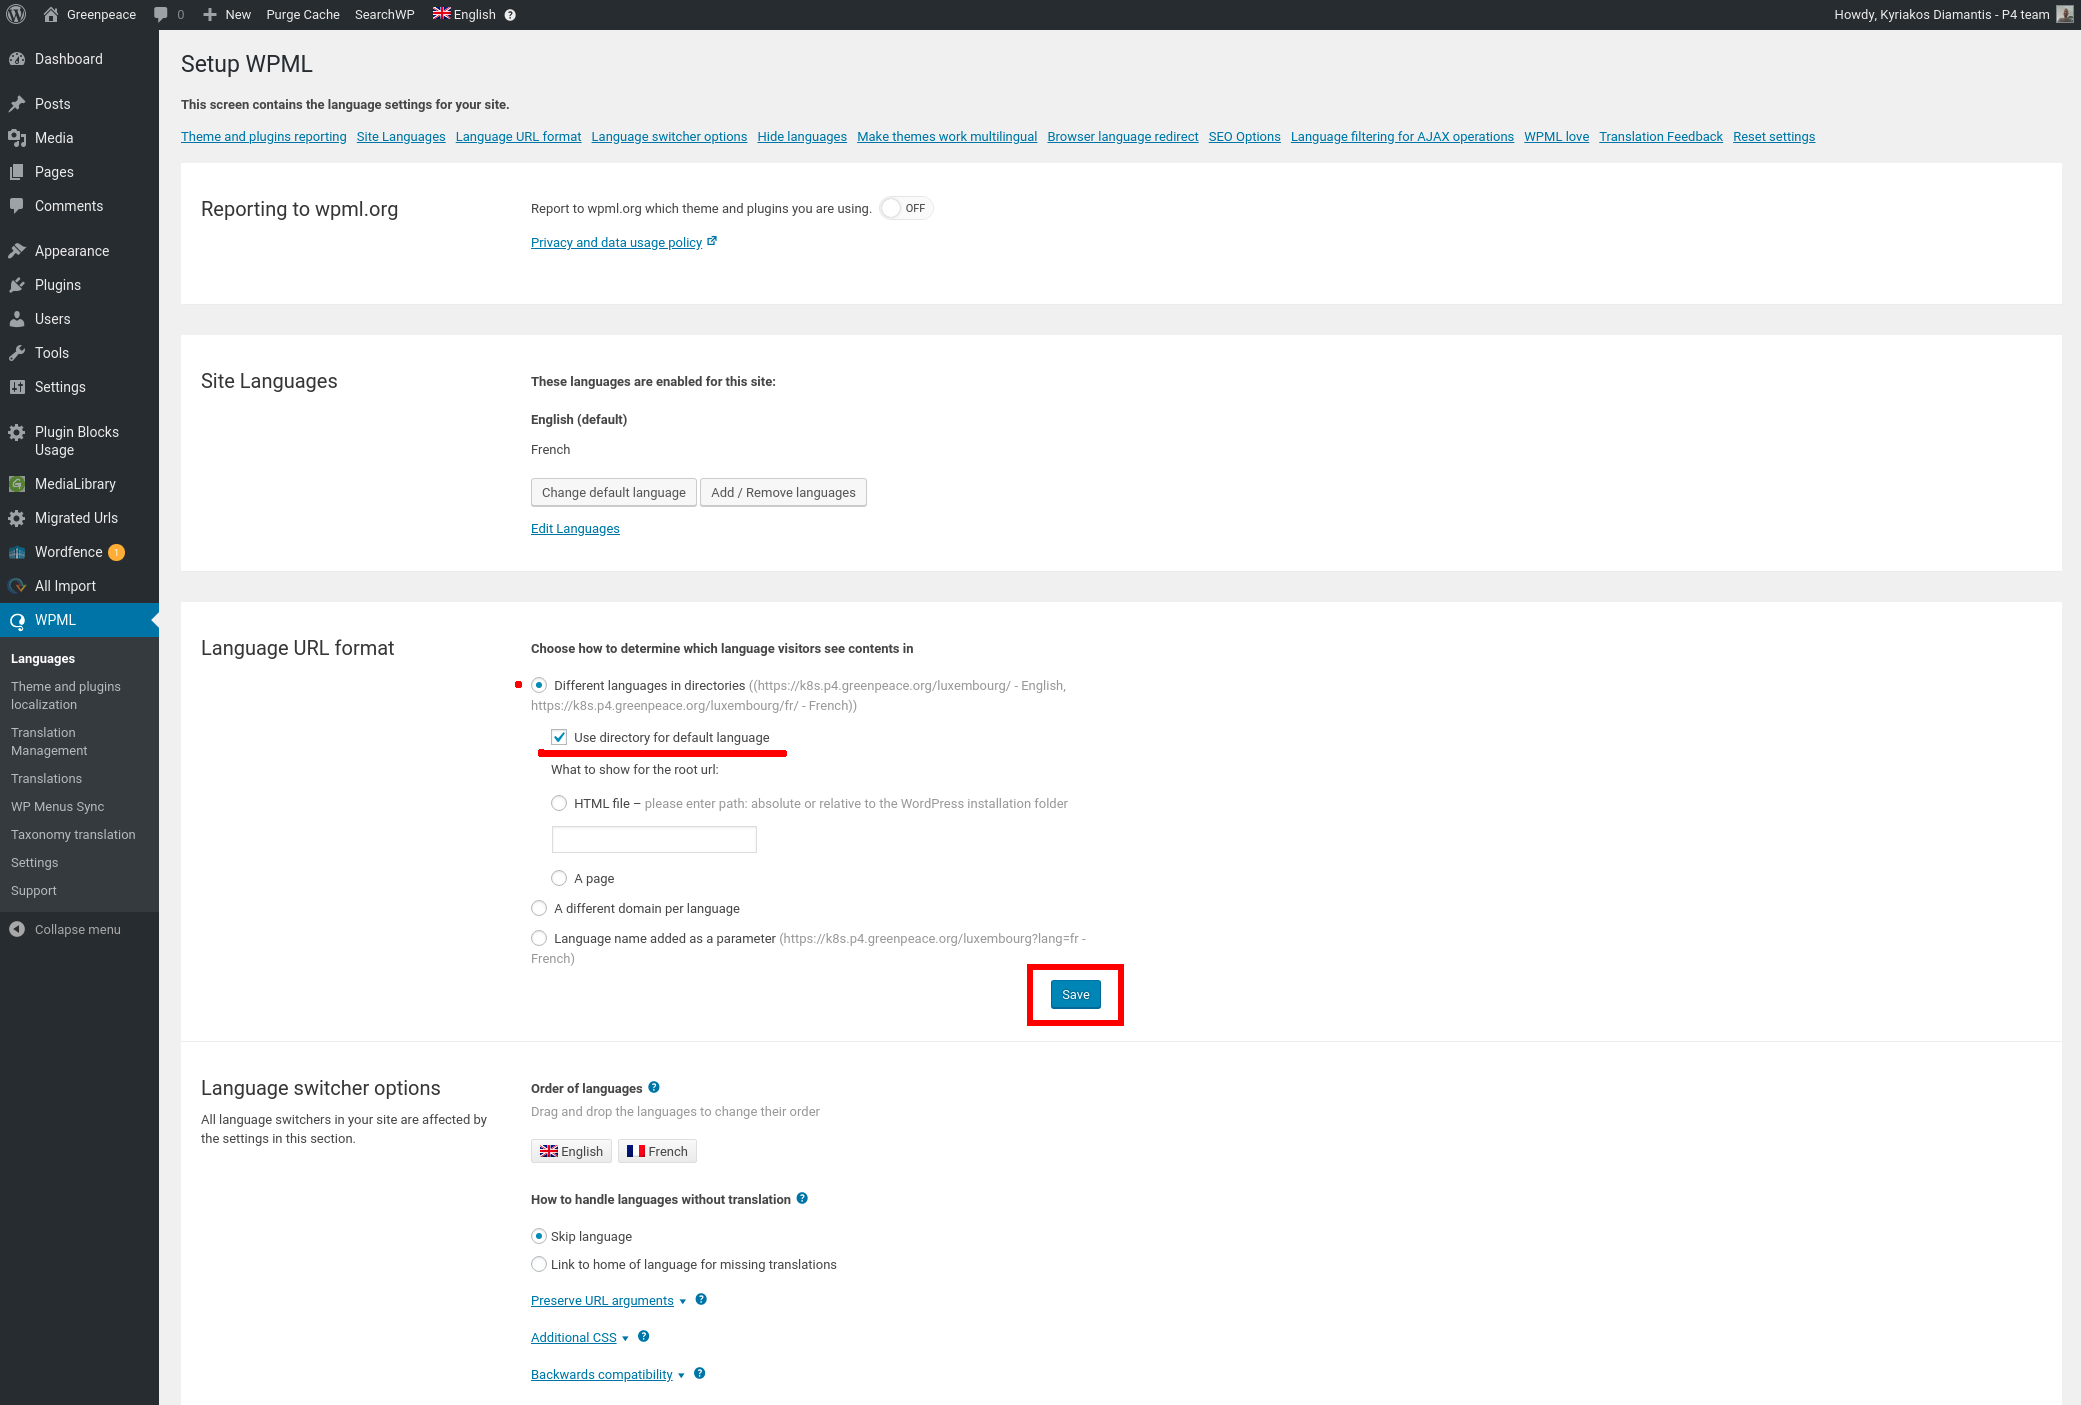
The configuration for the wpml plugin has been finished!!
- KEY INFO >> If the translated strings(Language translation in LOCO plugin) won’t reflect on frontend of site, then check the “Default locale” value at “WPML >> Languages >> Edit languages”. It should match the language “Locale code” in LOCO transaction plugin.
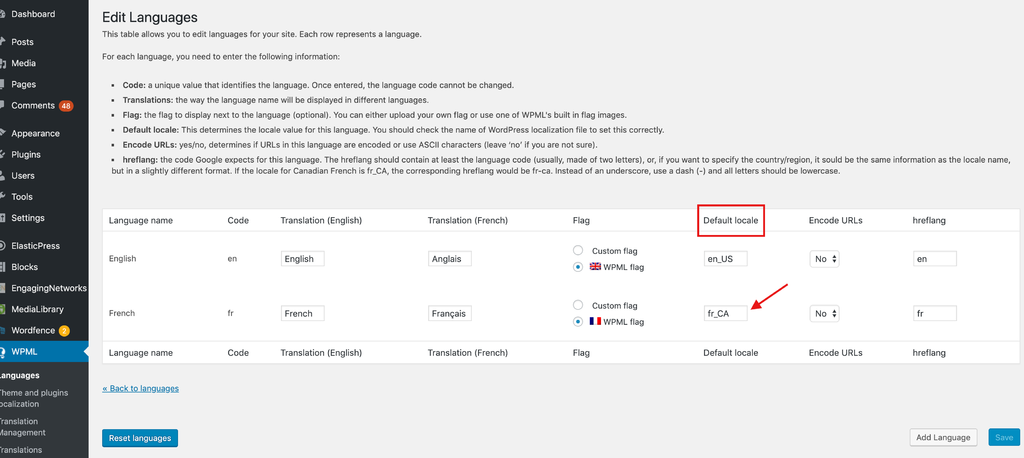
WPML language edit
