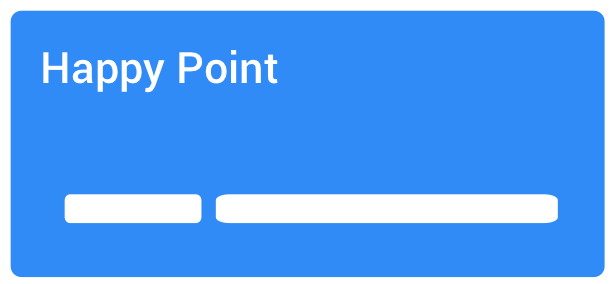
Purpose of block: This block ends a page with an image that can include the default subscribe link. In the default P4, we use this block right before the footer on almost all pages to show a final inspirational photo and ask supporters to signup to a newsletter from Greenpeace.
Set up the Happy Point
Pages: Home, Act, Explore, Take Action, Issue, Campaign Tag
KEY INFO >> the Happy Point is never mandatory and should NOT affect the layout of any page.
KEY INFO >> the Happy Point can only be used once per page and we recommend always embedding it at the end of the page since it was designed with that scope, having different margins than the rest of the blocks.
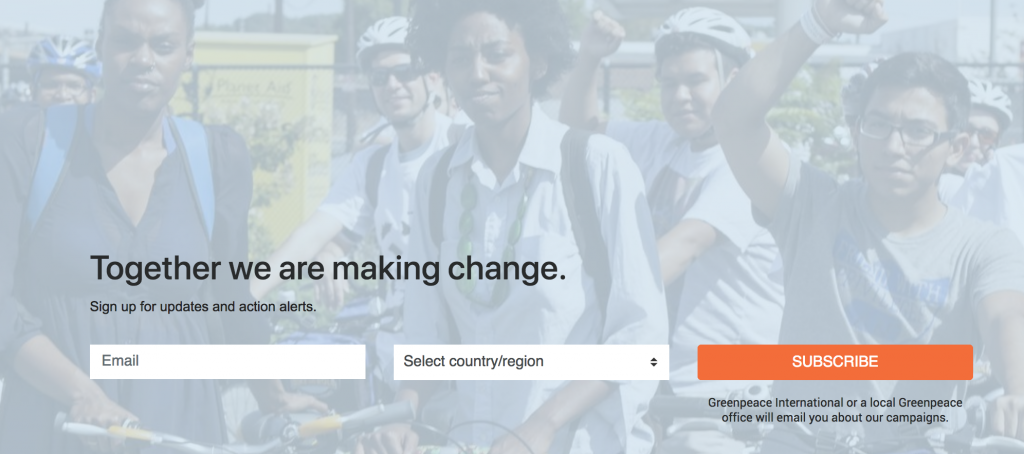
Choose a background image
Editor is able to place an image and have it auto-centered.
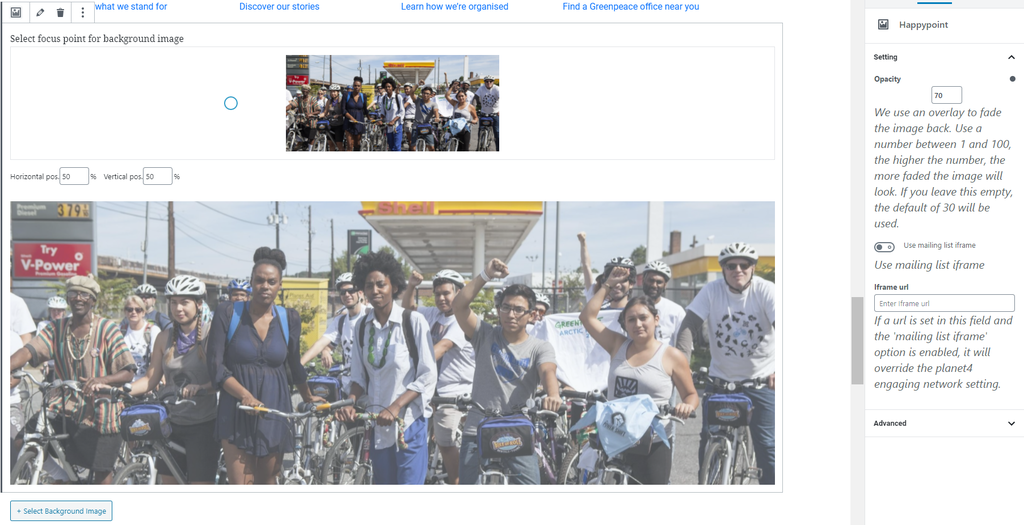
- select a background image from the media gallery or upload a new one using the Add media button
- max width for image is 1920px. To ensure quality please supply images with a width of no less than 1920px. An ideal width would be 2500px to allow for any minimal cropping.
- select focus point for background image
- above the image previewed, there is a smaller icon where you can select the focus point: there is a circle displayed, so you can simply hover over the image and select where the focal point to be.
Overlay and iFrame settings
A couple of settings have moved on the right side. These are:
- Overlay option/ Opacity
- use a number from 1 to 100 to select how fade you would like the overlay to be on the image. If you leave this empty, the default of 30 will be used
- Mailing list iframe option
- tick the box Use mailing list iFrame for the signup to newsletter field to appear
- there is also an Iframe URL field available – If a url is set in this field and the ‘mailing list iframe’ option is enabled, it will override the planet4 engaging network setting.
It is possible to add alternative Subscription forms in the Block, if for example you need forms in multiple languages.
By ticking “Use Mailing List iFrame” and adding the custom url your non-standard Happy Point form will be iFramed in that page.
Setup the form in Engaging Networks
Once you logged in into Engaging Networks account, here are the steps to create the Engaging Networks “Subscribe” form
- Go to Pages ⇒ Create Page

- Select List Management page ⇒ Sign Up Form ⇒ Next

- Next will lead to Page settings.
- Fill up the name, public title etc
- Once done, in the same page click on Manage Templates. You will be redirected to the template listing page
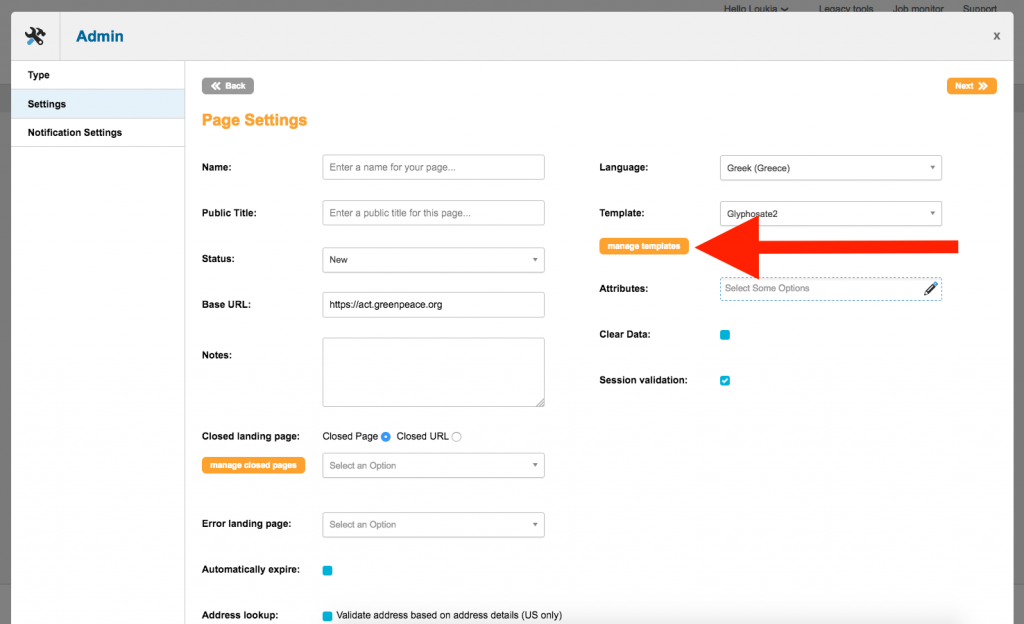
- click on “New Template”

- Add the template name and Add the header, footer content. You can copy the demo header and footer content from this repo
- Click on save button at the bottom of the page
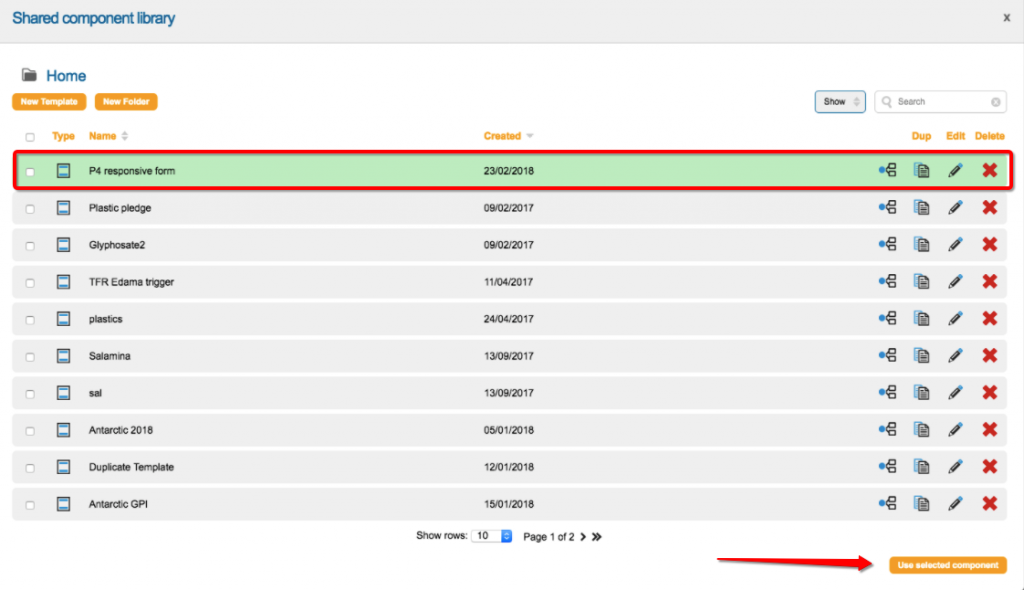
- Once done you will see the new template in the Home page menu. Now click on Use Selected Component.
- Click Next button on Page Settings page
- On the Notifications Settings page leave Default Transaction Recipient as is and click Next

- In page listing page, click on Edit icon to edit particular form
- On right side, there is Settings icon (Hammer / key)

- Here you can add row and insert multiple columns or components in each row by dragging them
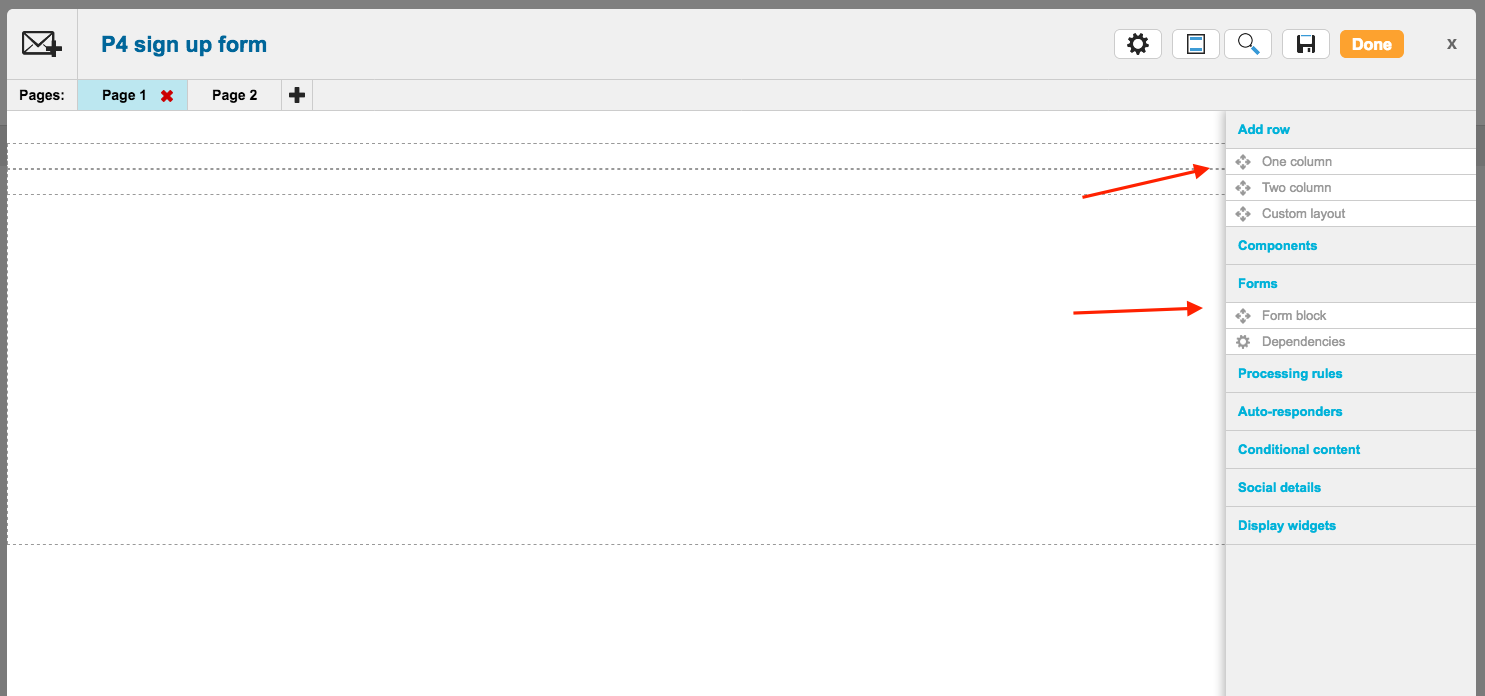
- Using the hammer icon Add Row and drag the “One Column” block
- Select and drag from Components the Text block to the row you have created and add your text (eg. Get action alerts in your inbox) with h2 heading.
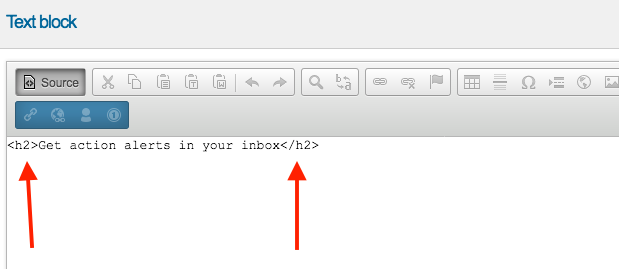
- Using the hammer icon Add Row and drag the “Custom layout” block
- Add 1 more column
- Add the following classes to each column as per below:
- For Column 1 : col-lg-5 col-md-6
- For Column 2 : col-lg-4 col-md-6
- For Column 3 : col-lg-3 col-md-8
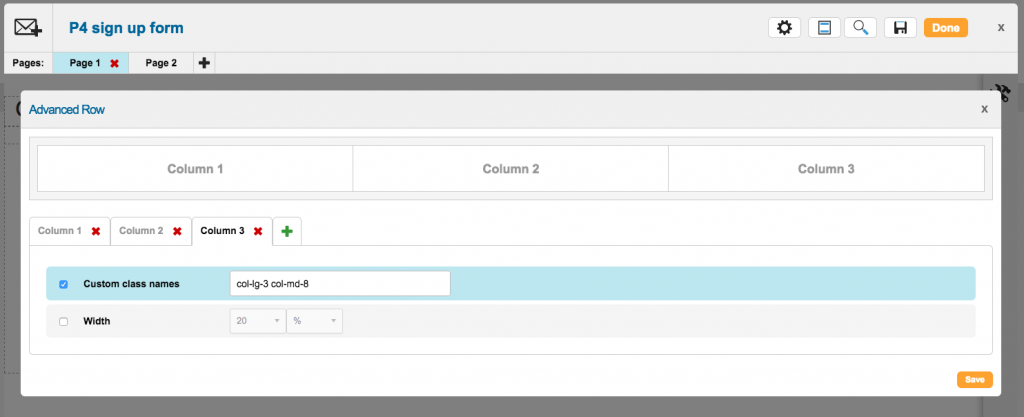
- Add content to the 3 columns
- Column 1
- Add the email field in Column 1: Select Forms ⇒ drag the Form block to this column
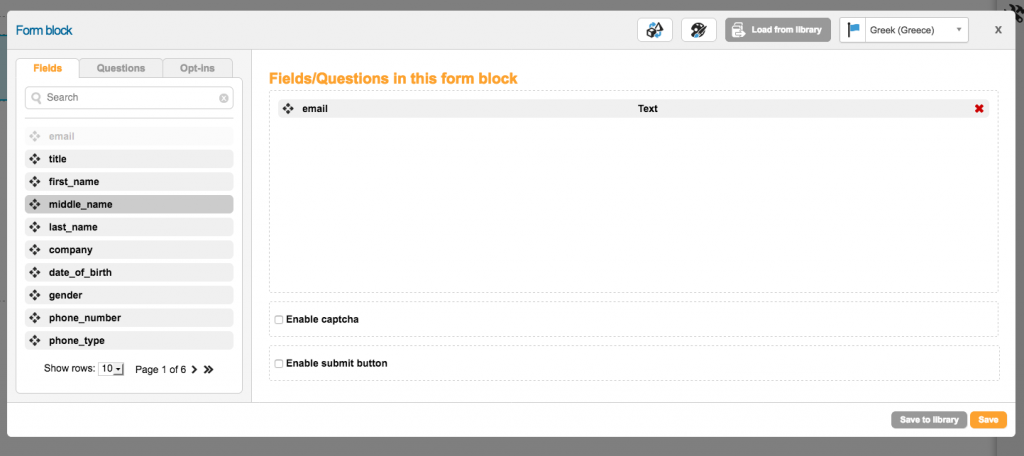
- Column 2
- Add the country field in Column 2: Select Forms ⇒ drag the Form block to this column
- Column 3
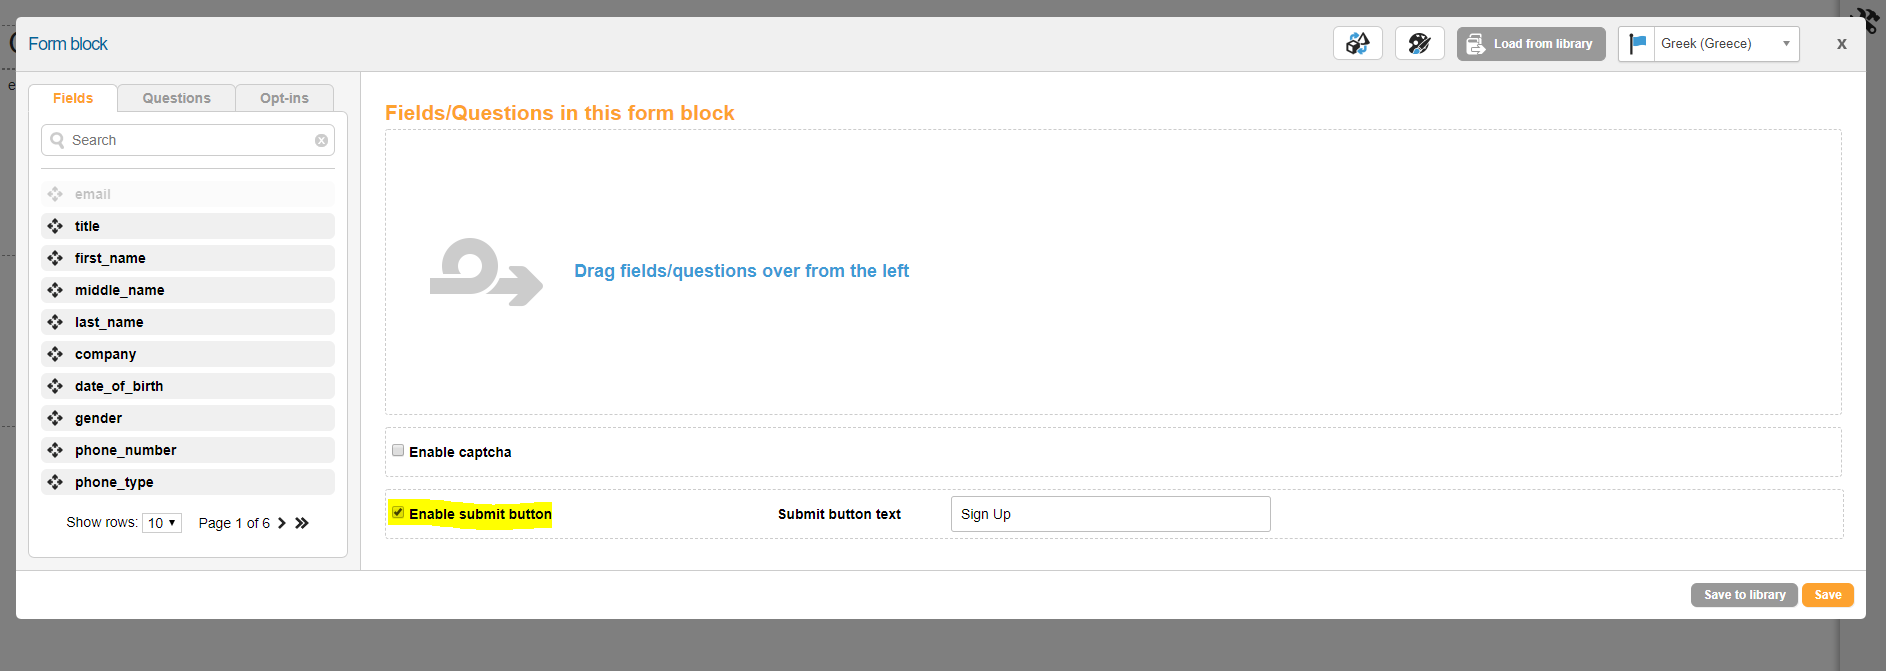
- Enable the submit button: Select Forms ⇒ drag the Form block to this column ⇒ Tick Enable the submit button option
- Column 1
KEY INFO >> each column should contain ONE field, to obtain a simple, effective Happy Point
-
- Select and drag from Components the Text block in order to insert text like eg. You can unsubscribe or contact us at any time for enquiries
- Add the opt-in question: Select Forms ⇒ drag the Form block ⇒ Go To Opt-ins tab ⇒ add the opt-in question
Since the Happy Point is not a classic “Sign-up” form, we do not need the opt-in question to be visible so you need to add this script to the footer:
<script>
$(‘.en__field–email-ok input’).prop(‘checked’, true).parent().hide();
</script>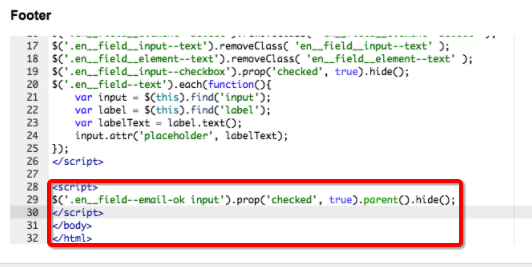
- Add your Thank YOU message by selecting and dragging from Components the Text block to Page 2 to insert your text (eg. Thank you for subscribing!)
- Go to your Engaging Networks Page Settings and change the Status to “LIVE”
- Copy the URL of your live form (open it in a new tab to test it, here’s the GPI form – https://act.greenpeace.org/page/16381/subscribe/1 )

Should your Happy Point require extra fields and / or longer text, like the Greek Happy Point, you will have to increase the iFrame height of your P4 child theme accordingly. The P4 Team added some custom JS in the footer of the form to make sure fields take full width in the mobile screen. Now, depending on which field your NRO needs in the form, you have to apply the classes for them. Your Planet 4 team can help you. |
Connect the Engaging Networks form to Planet 4
- Copy the URL of your live form and go to P4 Settings ⇒ Planet4 ⇒
- Paste the form URL in Engaging Network ID
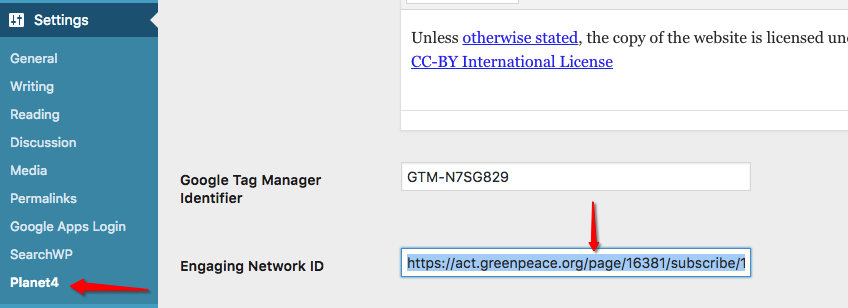
- Hit “Save” at the bottom
Set up the Happy Point form in other tools
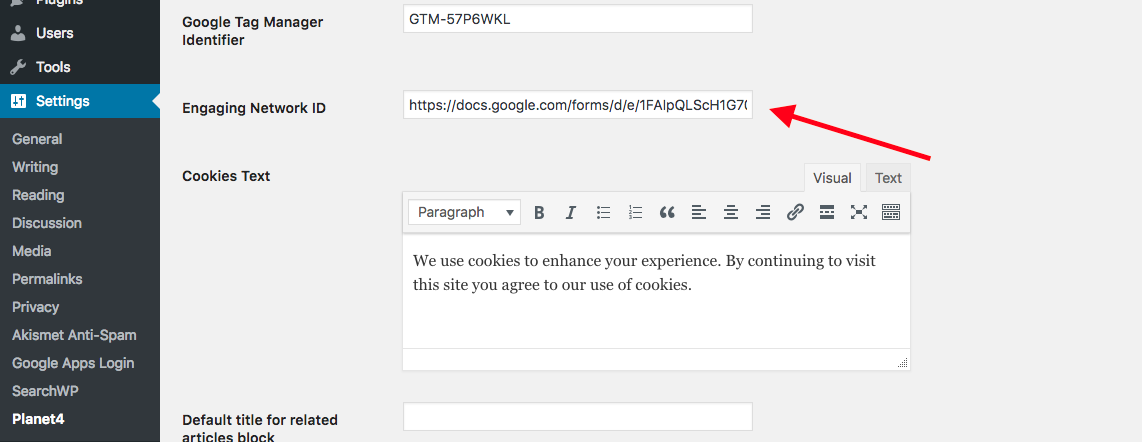
If your office is not using Engaging Networks then there is also the possibility to configure a form hosted in another source. You can do this by adding the URL of your form in the Engaging Network ID field like is shown below.
Multilingual domains: Set up different form for each language
In order to set up a different form for each of the languages in your site you need to follow the same set up procedure for each language. If your site has more than one language, you’ll see at the top of the page a language option:
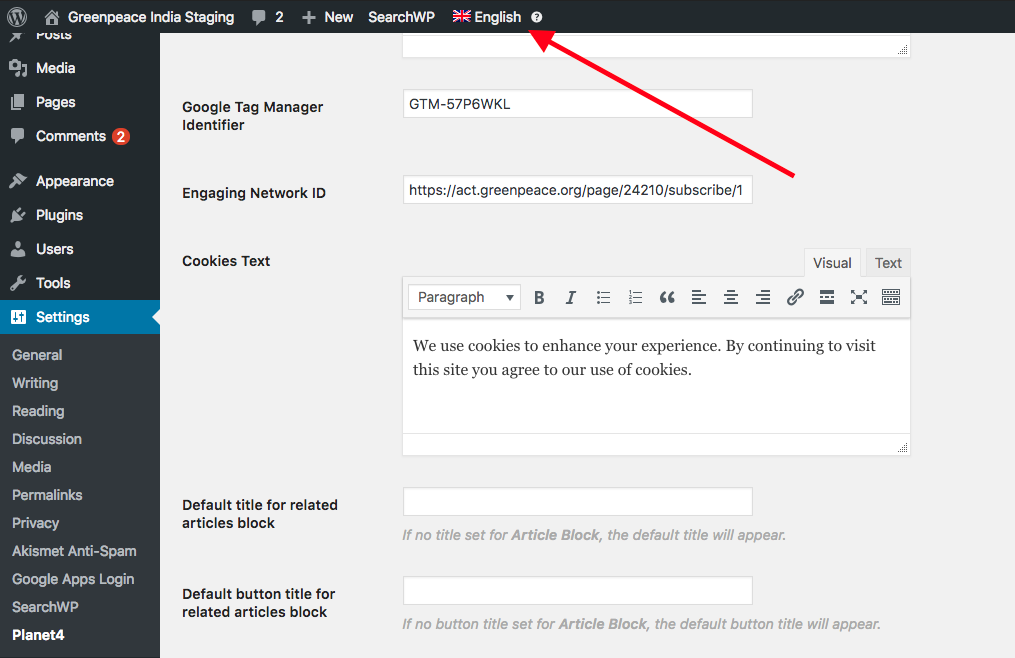
- Make sure you fill in the Engaging Network Id for the corresponding language selected on top and save changes
- Then switch the language and fill in the corresponding Engaging Network ID for the language selected
- Save Changes
Insert the happy point in Planet 4 pages
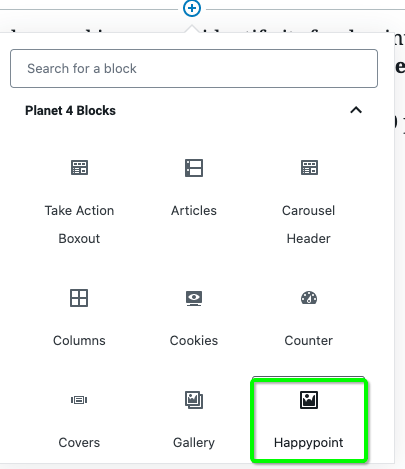
Hit “Add Page Element” in the edit mode of the P4 page (the ideal place for the Happy Point is the bottom of the page, right before the footer) and select the Happy Point block
- Select the Background image and identify its focal point
- NOTE >> The ideal size for a Happy Point image is 1745px width X 500px height
- In any case, never use an image of less than 1200 px width
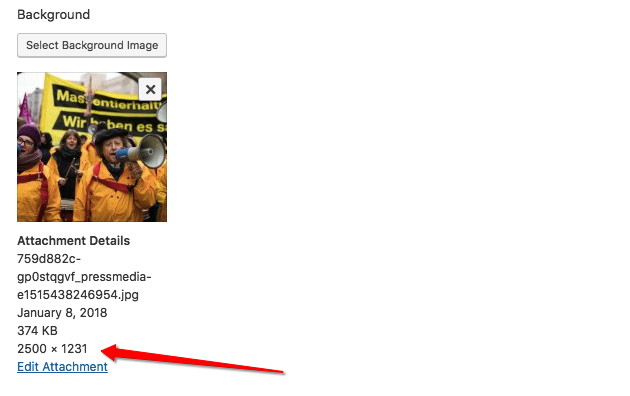
- Edit the image overlay, if you want to modify the opacity of the happy point, the higher the number, the more faded the image will look. If you leave this empty, the default of 30 will be used.
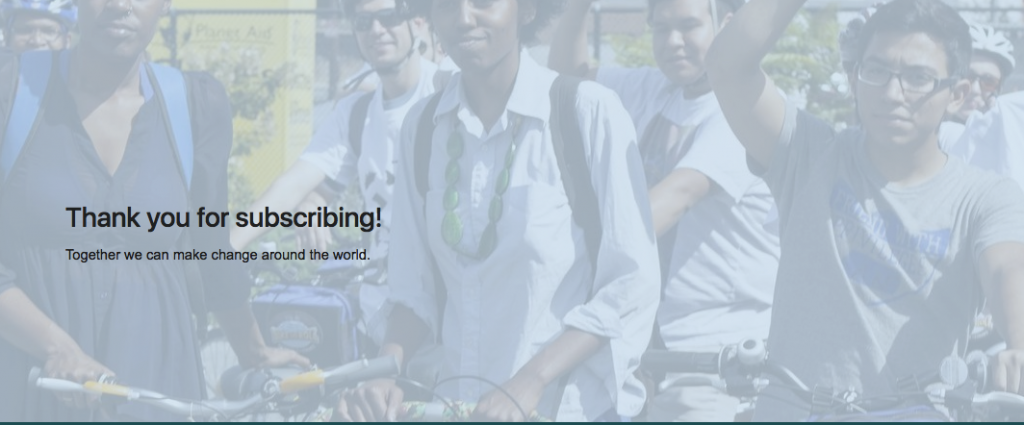
Below a good example of a Live Happy Point!

Here’s the Thank You message of our form
Design Elements
All design files of the block are available in the P4 Design Systems > Blocks > Happy Point
